Wednesday, December 26, 2012

Dinner for 1

Going through my current "lifestyle change" has left me with the quandary of what to nourish my system with... Typically, this time of year I make at least one pot of soup a week and eat off that for a while... My housing situation has changed and I am not as free to make those decisions as I once was (and hope to be again in the not-too-distant future). I have been left with making GF pasta (which gets old really fast) or purchasing frozen dinners. Now, don't get me wrong, frozen dinners have come a long way from the cardboard crap of the past... With steam bags and trays, frozen dinners seem a mighty good (and healthy) option... However, with my dietary restrictions, I can only eat about 1/5 of the offerings, and of those 1/5, I usually only buy 1/4 based on my own tastes... You can see where things get challenging and I end up just going to McD's and getting a plain bacon cheeseburger...

Case in point - I purchased a potsticker entree for my lunch one day... It had red peppers in the "veggie mix" but I was willing to overlook that addition and just pick them out... I also neglected to read the KIND of potsticker that was listed on the front... Getting a tofu one instead of chicken or pork is kind of a let down... Since I was the stupid one who didn't read the package all the way, I made myself eat it... or at least I tried to eat it... The potstickers tasted like sweet and sour feet and the "veggie mix" was entirely made up of red peppers... Yuck!

I had an epiphany! I can purchase potstickers that I like, add some frozen brown rice, and the veggie mix of my choice and make my OWN frozen entree! So I got a small bag of chicken potstickers (a little bit healthier than the pork variety, but still tasty) and some already-frozen brown rice. I added about 1/2 cup of the brown rice to the bottom of a plastic container and added 3 potstickers on top (the # 3 came from the amount in the original "tofu" packaging). Then I topped off the container with broccoli. **IT IS VERY IMPORTANT THAT ALL THE INGREDIENTS STAY FROZEN... MAKE THESE, THEN EITHER MICROWAVE IMMEDIATELY OR PUT THEM BACK IN THE FREEZER**
Still frozen, with a bit of sauce added....


Now, I know that this is NOT a GF dish - the potstickers are made with flour... But since I'm allowing myself to eat the potstickers, I prefer to keep it "gluten-lite" and use teriyaki sauce made with tamari rather than soy... It's a personal preference. If you have a better "sauce" then by all means use it... Pour some over the potstickers (to add a bit of moisture to the skins while they cook) and a bit over the broccoli... Then put the lid on and stick it in the freezer for future use... Don't go overboard or your rice will be overloaded with teriyaki sauce and it probably won't be as good. BTW - Yoshida's sauce would probably be awesome on these!

Cooked, and ready to eat!
When you are ready to eat it, just open up one of the corners of the container to allow it to vent and microwave for around 5-6 minutes... This is very easy to put together and keeps well in the freezer. Great for a night when you are by yourself and don't have the time or inclination to cook a meal... And this way, you know pretty much what went in to it (other than the potstickers, of course) because you picked all the ingredients yourself. Season however you want... I typically add just a bit of black pepper...

Tuesday, December 4, 2012

Entertain Me


These olives are really good and easy to find. The yogurt was delicious too. Try the strawberry. Found at your local Kroger or Fred Meyer family of stores. Next time you're late for a family function or party, grab some of the private selection and be entertained.

Thanks BzzAgent for introducing me! 

Chicken's Done!

Want a quick easy alternative to marinating your own chicken? Try Purdue Oven Ready Roasters. :-)

BzzAgent sent me some promo materials. Thought I would share.


Sunday, December 2, 2012

Raid the Fridge Bruchetta

I can't remember if I've spilled the beans here yet or not but I'm about 18 weeks pregnant at this point. (Translation - a little over 4 months along) Although I'm not experiencing the "normal" pregnancy symptoms all the books seem to talk about (frankly I feel like I'm totally allergic to pregnancy), I am starting to get a bit more of an appetite. I was hungry this afternoon and my cravings seem to center around things with HUGE flavor and that stay rather healthy.  I think I got lucky on that one. Hopefully the little one feels the same way. Either way, I did some fridge diving and came up with an old favorite I haven't made in quite awhile. It's quick, easy, and requires very little cleanup. These are all big plus signs for me so I'm going to share in case you feel the same. :-) 

Easy Bruchetta

-  Nice thick Italian or French Bread, sliced on the diagonal - my slices ended up being    about 4 inches across - average 2 pieces per person
-  1 clove fresh garlic, smashed and diced
-  1/4 cup finely diced onion
-  8-10 fresh basil leaves (estimate, it's ok), julianned
-  2 nice tomatoes, diced small (this will make about 5-6 slices)
-  2 slices of Capicola ham per serving - you can probably substitute any cured meat here, we just like capicola
-  a good quality balsamic vinegar
-  a good quality extra virgin olive oil (I noticed the irony too)
-  a pinch or two of salt
-  fresh grated Parmesan (again, optional but fantastic!)


Mix together the tomato, basil, onion, garlic, and a pinch of salt in a small bowl. 

Lay the bread out on a cookie sheet or your toaster oven pan. I like the toaster oven because it's a little easier to control and way quicker. 

Spoon the tomato mixture onto the bread evenly across all slices. 

Chop up the Capicola and sprinkle on top of tomato mixture. 

Drizzle each slice with balsamic and olive oil in about equal amounts. 

Place under broiler (or on broil in toaster oven) for 5-6 minutes. Keep an eye on it and when the exposed bread turns a little golden it's ready. The Capicola will also start to bubble and get crisp. It's like bacon but better! 

Take out and using a spatula transfer to a plate. Grate some Parmesan on top and add just a pinch more salt to finish. Salt is optional but I think it's rather tasty with it combined with the tomato. 


My Description of one serving


How much I actually ate, and savored every bite!


You get your essential oils in the garlic and olive oil, some spice with the basil and balsamic,  vitamins in the tomato, and well other than that it's just good! It's a great lunch or dinner. It's also really good paired with some mixed greens with a little of the balsamic and oil drizzled on top. Add a dash of oregano and it become spectacular. 


Thursday, November 22, 2012

Thanksgiving Traditions...

Family lore states that this recipe was concocted by my grandmother (Charlotte, of peanut butter fudge fame) and her mother... in a time when people didn't waste a thing...

While making pies for a holiday feast, they ended up with extra pumpkin pie filling and extra apple pie filling... Not enough to make individual pies themselves, but too much to waste... So, in a moment of GENIUS they layered the apples and pumpkin and created the "PUMPLE PIE"... It just isn't the holiday's in our house without one...

Last year, I made a really AWESOME version and posted it on my "original" blog... I could not find any sugar pumpkins in the store this year, so I wasn't able to make it "from scratch" but I still wanted one... So I made an acceptable version...

Ingredients....
The players: Libby's Pumpkin Pie Filling (which I don't usually like to use, but I was in a hurry at the store and couldn't find the "real" pumpkin stuff so I made do with this), Pre-made Pie Crust (I usually like Marie Callender's but, again, I was in a hurry and it looked like they were out), Egg-Beaters (I've noticed that when I use pasteurized eggs in the carton, I don't get the allergic reaction that I get when I use whole eggs), Evaporated Milk, Butter, Pumpkin Pie Spice (I prefer this to cinnamon, ginger, cloves, and nutmeg, but you can use whatever spices in whatever quantities you want), Brown Sugar, 4 Apples (Braeburn and/or Fuji - I like mixing my apples for the best combo of flavor). I got the big can of pumpkin that makes one 9" Deep Dish pie... when making Pumple Pies, this particular recipe makes two pies.
First, peel, core, and shop the apples into bite-size pieces.

Next, melt some butter in a pot...

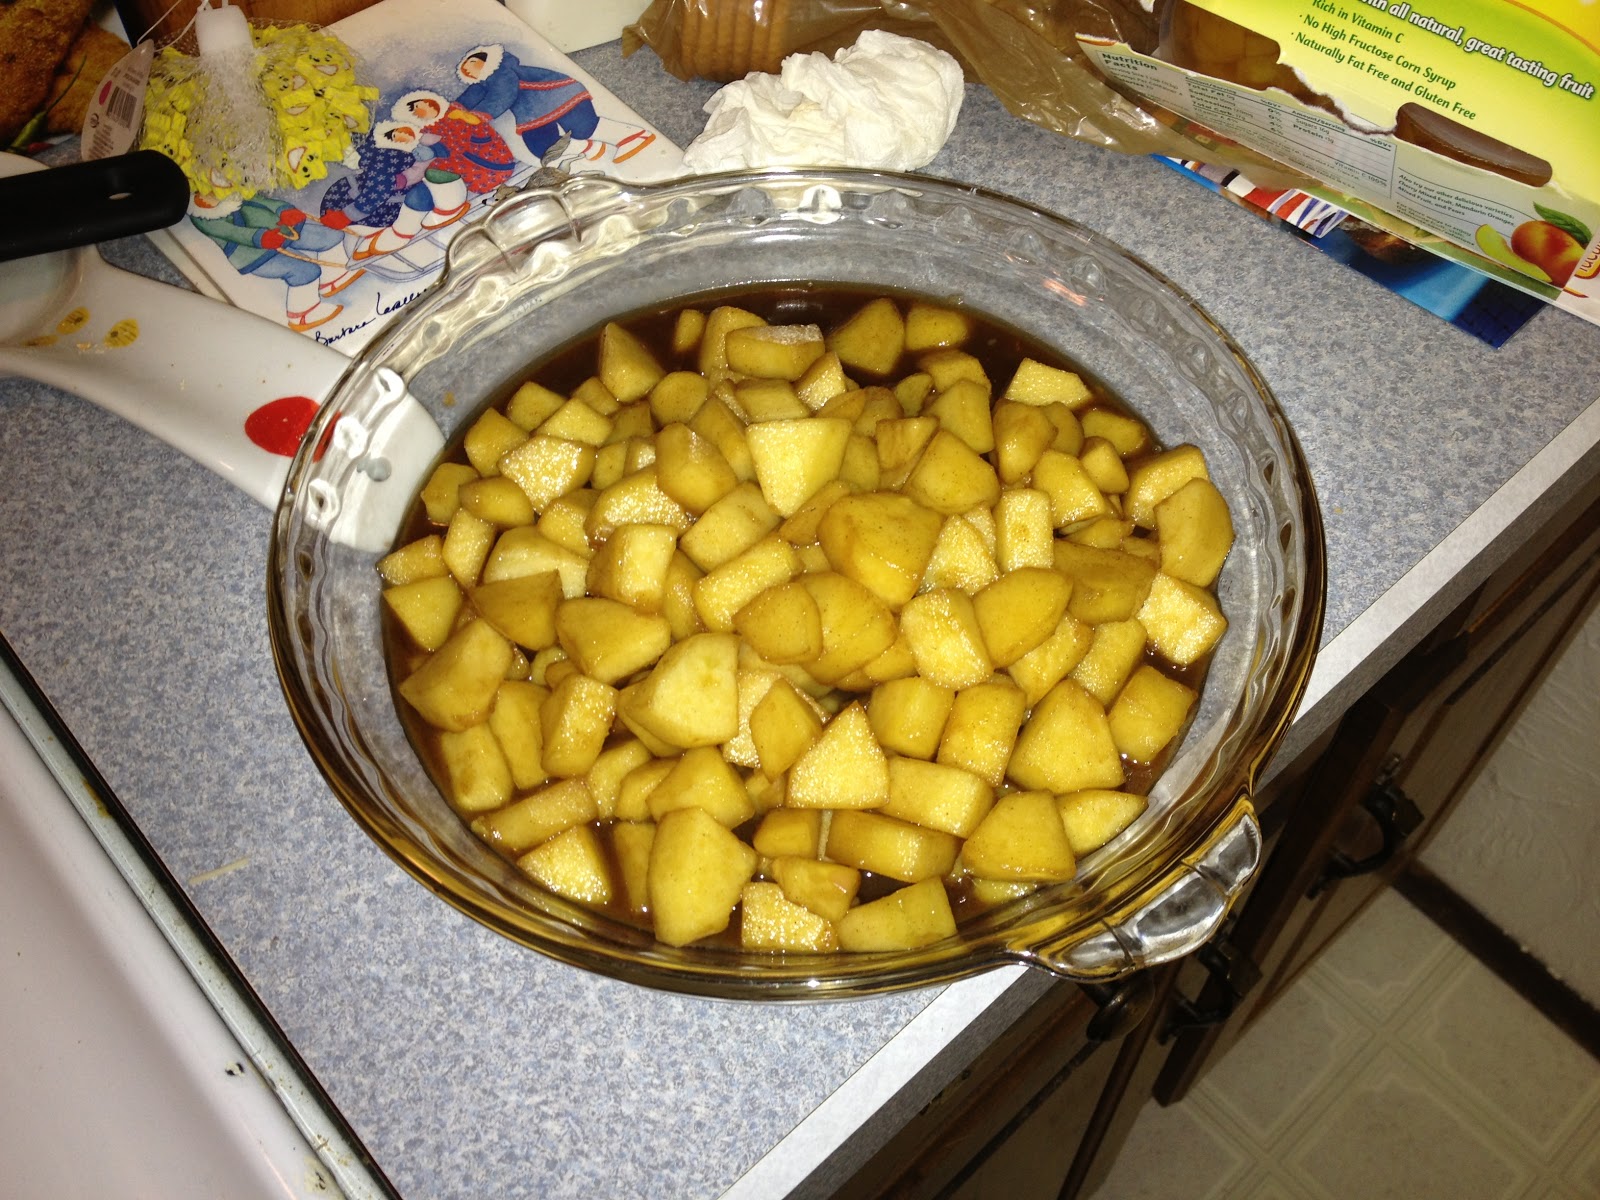
... and add the apples. Saute for about four minutes.

Then, add about 1/4 to 1/3 cup of brown sugar and about 1/4 to 1/3 tsp of Pumpkin Pie Spice and a dash of salt.

Mix well and continue to cook until the apples are tender and the sauce starts to thicken.

Remove from the heat and let cool (I find this works best in a 9x13 glass cake pan, but use whatever you have)

While the apples are cooling, thaw the pie crust and place on a foil-lined cookie sheet (you'll be very sorry if you skip this step). Use a fork to dock the bottom of the pie crust (ie: poke a bunch of holes in it)

Next, add the pumpkin, eggs, and milk to a bowl (using the recipe on the can of pumpkin)

Mix thoroughly to combine.

When ready to assemble the pies, get all of the ingredients together and preheat the oven according to the directions on the can of pumpkin.

Add a layer of apple to the pie crust. You can spoon in a bit of the cooking liquid from the apples.

Ladle the pumpkin on top of the apples... The dark ring you see around the top of the crust is because I added too much apple cooking liquid before adding the pumpkin...
 Put in the oven and bake according to the directions on the can of pumpkin...

Just out of the oven... Now you see why the foil-lined pan is necessary... no one wants to clean their oven ON the holidays...

Let cool ... as you can see, the pumpkin slumped a bit... I did not precook the apples long enough for them NOT to shrink in the pie... Additional apple liquid bubbled up through the pumpkin... But that's only because I added too much to the apples upon assembly...
The finished product! You can see how the layers form...
If you don't want to try to make one of these yourself, just come on over to my house on Thanksgiving or Christmas... I will always have one (or two) around...

Of course, as always, if you have a favorite pumpkin pie filling recipe, apple pie filling recipe, pie crust recipe, etc, please feel free to use your favorites... This tutorial is more a "concept" than a strict recipe.

Happy Thanksgiving Everyone!

Tuesday, November 13, 2012

Quinoa with Roasted Garlic, Tomatoes, and Spinach

Jessie has some quinoa in her panty and doesn't know what to do with it... So I decided to research a few quinoa recipes for her. I found one that interested me enough to try for dinner tonight. You can find the original recipe here, but I decided to modify it a bit. Mainly, I adjusted the roasted garlic part... Jessie told me to roast the garlic at 375 degrees for 25 minutes... Next time I should probably go for 30-35 minutes, but I'll play with that part of the recipe later...
Most of the ingredients... The garlic was in the oven and the quinoa was rinsed by the time I took this picture...

I rinsed the quinoa, also as per directions (it keeps it from getting bitter). Note: either use a SUPER-FINE mesh strainer or use a bowl and your hand to drain the quinoa... the mesh strainer I used had holes bigger than the grain, so a bit went down the sink...
Rinsed quinoa....

As the garlic was finishing, I sauteed the shallots and crushed red pepper. I didn't measure the shallots out, I just used the smaller part of the bulb.... I also didn't measure the crushed red pepper, just eyeballed it... Added the quinoa, as per the directions and then splashed it with some white wine (probably more than the recipe called for but, meh....)
Quinoa, shallot, & red pepper flake mix... after wine...
After the addition of the chicken broth....
Of course, when cooking with wine, it is customary to pour yourself a glass, or two (or three, I won't judge)...
Wine... yummy... I had to have an extra glass since Jessie cannot (preggers)

While the quinoa was cooking as per directions, I took the garlic out of the oven and let it sit for a bit....

Roasted Garlic

Another departure from the recipe - it calls for a chopped, seeded, small tomato... I chose to use grape tomatoes cut in half and NOT seeded... but that was purely my choice...
Halved Grape Tomatoes

When the quinoa was cooked, I added the tomatoes, spinach, and parmesan cheese and mixed it all together...
Mix it all together...

Note: you should probably taste the combination after you add the parmesan and before you add extra salt... I used "full-strength" chicken broth (and not the reduced sodium type) for the recipe... The parmesan is a bit salty on its own and the addition of salt after the parmesan was added was a bit too much for me... Still edible (and tasty), but not as amazing as it could have been...


If you are making this for a side, it makes 4 servings... If you are making it as a main dish (as I was), it makes two...

I will definitely make this recipe again, as it is light enough for the times when I don't want to eat a heavy dinner, and it has a lot of nutritional value... Apparently, quinoa is high in protein, so it is good for "meatless" nights... It is also awesome for any garlic lover... It is awesomely garlicky!

Monday, November 5, 2012

Fabulous 15 Minute French Onion Soup

Pregnancy. It comes with lots of stuff but for me its filled with nausea, food aversion, and weird cravings. Oh yeah, and insomnia. That's where this recipe came in.

We cancelled cable awhile back. We weren't watching it and quite frankly most times I don't miss it. We Netflix now. :) That being said, when you're awake at 2 am there is VERY little on in rural Mississippi. We have religious programming, infomercials, bad newscasts, and PBS Create network. That last one is a savior for me. They are like HGTV without the vapid ugly decorating whores. Mostly though, at night, they rerun the fantastic episodes of French Cooking with Jaques and Julia. This is perhaps my favorite show of all time.

The episode on was for many things like delicious Choux pastry from which cream puffs and wonderful turnovers and danishes were made (that to come later). They also made a wonderfully simple onion soup. So I have had this craving for 2 days now. It's easy, takes like no time at all and tastes wonderfu1!

Fabulous 15 Minute French Onion Soup (for one)

1/2 large onion, large diced
1 can or 1/2 carton good beef stock, I go with Swanson or Kitchen Basics
3 healthy slices of a good french or Italian bread, we had some for making deli sandwiches in the house (note: don't use loaf bread here, go splurge the $1-$3 at your local bakery for good bread. It's totally worth it)
 1 1/2 cups Cheese, it calls for Gruyere but I didn't have that so I mixed a nice salty goat cheese and parmigiano
salt and pepper to taste (liberal)
1-2 tbsp butter

Depending on the size of your pot, put in enough butter to cover the bottom thinly when heated. Turn heat to high and add in the onion.  Sprinkle on a decent amount of salt. Crush some peppercorns and add. Saute until the onions are translucent.

Add in the beef stock and bring up to a nice rolling boil. Reduce to medium heat and add in half the cheese. Stir constantly until melted. it only takes a minute or two. Taste and adjust the salt and pepper as needed. Remove from heat.


I used my toaster oven to toast the slices of bread. Break them up and put them in the bottom of a nice bowl or crock. Add the onion soup over the bread. Sprinkle the remaining cheese on the top. Put the whole bowl in the toaster oven on broil until the cheese bubbles.

Wait a few minutes, hot cheese burns your mouth. It's quite delicious!

I never knew it was quite that easy but it makes a nice easy meal for one or two! (Jeff goes sin cebolla)