Monday, October 5, 2015

Coke Life - BzzAgent Promo

Some of you like your Coca-Cola products. They just introduced a new product that has lower sugar levels and no artificial sweeteners. A decent option in lieu of regular Coke!


Thursday, August 27, 2015

Israeli Street Tacos

Fusion... usually code for "Nothing looks good so lets throw it all together and hope for the best"... Not this time folks! See I love Israeli food, and I love Mexican food. What's better than combining them?!

This may take some effort but I assure you it's well worth it....

Ingredients:

Olive Oil
a few springs of Thyme
1 Garlic Bulb
Green onions
1 lemon
salt/pepper
Parsley (flat leaf preferably but any will be fine)
Mint
Dill
Cilantro
ground Beef (try to go decent quality and around an 85/15 fat content)
1 cup chicken stock
1 sweet onion
a scant cup of bread crumbs (I just toasted some left over garlic bread and broke it down in a spice grinder)
cumin
capers
1 egg
Baharat (don't worry, recipe for that follows)
- 1 tsp black peppercorn
- 1 tsp coriander seed (I like a touch extra in mine)
- 1 small cinnamon stick, smashed into smaller pieces
- 4-5 whole cloves
- 1/2 tsp allspice
- 2 tsp cumin seeds (again, I like more cumin, it's my favorite spice)
- 4 cardamom pods
- 1/2 nutmeg, grated

Naan bread
Greek yogurt
fresh diced tomato
Extra cilantro and mint


Instructions:

In a dry pan on mid heat put in all the baharat spices. Heat until you start to smell the aromatics release. It'll smell heavenly. Like a savory Christmas smell.

Put them in a spice grinder and let her rip!

In a bowl put ground beef, egg, baharat mix, bread crumbs, shredded or finely diced sweet onion, capers (chop them up if any bigger than a small corn kernel), cumin, and garlic cloves (finely diced up).

I like to use an Ulu for herbs. It's a traditional Alaskan knife used with a bowl or alone. They're extremely sharp and quite lovely. If you don't have that, put your herbs in a small cup and use kitchen scissors to give it a good mix and chop.

Add about 3/4 of your herbs along with salt and pepper to taste to your meat mixture and mix up well. Ball it up yo! About quarter sized balls are good. I put mine in a hotter than hell cast iron pan with a touch of oil and brown the outside, then add 1/2 - 1 cup of chicken stock, and put in an oven at 300 for about 20 minutes or until they're cooked and most of the liquid cooks out.

Grab some naan and toast or bake it to warm. I like the small naan breads myself. I'd tell you I make it from scratch but I have yet to find a good recipe that doesn't turn out terrible for me.

Mix some of your Greek yogurt with your remaining herbs, a touch of salt, and lemon juice.

Spread the yogurt mixture on your naan, smash up some meatballs on there, add your tomatoes, and sprinkle on some cilantro, green onions, and mint.

We like to add a bit of edamame for some green in there. That one is up to you.

So good... really... sooooo good!


Wednesday, November 6, 2013

Roasted Butternut Squash and Vegetable Soup (version 1)

Ah.... autumn... in the Pacific Northwest... Soup weather... with the addition of fresh produce from the local farmers makes it must better! Relocating to Washington was a GREAT idea!

So, I was gifted with a butternut squash the other day... I've never eaten butternut squash before... I did a bit of research on how to turn it into soup... I came across a recipe for Roasted Butternut Squash soup. I used it for inspiration, taking some of the comments into consideration... Here is my first version of the soup:

Ingredients:
1 Butternut Squash
1 Granny Smith Apple
1 Medium Yellow Onion
2 Carrots
3 Parsnips
Olive Oil
2 quarts Chicken Broth
3 cloves Garlic
Salt, Pepper, All Purpose Seasoning
Hashbrown Potatoes
(an afterthought - Pumpkin Pie Spice)

Preheat the oven to 425 degrees. Cut the squash in half and scoop out the seeds. Cut the apple into quarters and cut out the core. Cut the onion into eighths (in half, in half, in half). Peel and chop the carrots and parsnips into large pieces. Add all items to a baking dish and drizzle with olive oil and season with salt and pepper.


Roast the vegetables for 50 minutes.


Transfer the roasted vegetables to the pot, scooping the squash from the skins with a spoon.


Pour some of the chicken broth into the roasting pan to deglaze it a bit (scrape up the brown bits).


Pour the liquid from the baking dish into the pot and add the rest of the chicken broth. Sprinkle on about a teaspoon or two of the all purpose seasoning (feel free to use what you want, I used my go-to seasoning). Throw in the garlic cloves whole at this point.


Heat over Medium heat to simmer for a while (I didn't time it - some of the vegetables didn't cook all the way through in the oven, so I cooked it a while until everything was tender). Add a bag of (non-frozen) hashbrowns.


Cook a while longer, then blend the contents of the pot (I used my immersion blender).


Add more salt and pepper to taste. As an afterthought, I sprinkled a bit of Pumpkin Pie Spice to it at this point as well.

I added the hashbrowns to the mix in place of cream from the original recipe. It makes a nice thick soup when blended but doesn't have the added fat and lactose that the heavy cream does.

Next time, I'll experiment with the roasting process so the apple doesn't cook too quickly and the squash is easier to deal with.

Thursday, March 21, 2013

You Put the Key Lime in the Cookie and Shake it All Up

While visiting Jeff in White Salmon, WA one of his new friends mentioned Key Lime Pie. Well that started a ball rolling talking about Key Lime everything. Growing up in Florida I have always been a Key Lime fan. I just didn't feel like making meringue and lets face it, Key Lime Pie just isn't right without meringue. 

So leads me to the cookie. Oh the glorious cookie. Sort of a mildly sweet citrus taste. 


Ingredients

1/2 cup butter
1 & 1/8 cup sugar
1 egg + 1 egg yolk
around 2 cups of AP flour (enough to get the right consistency, start with 1 1/2 cups and gradually add the rest at the end)
1 tsp baking powder
1/2 tsp salt
1/4 + 2 tbsp Nellie and Joe's Key Lime Juice (DO NOT SUBSTITUTE unless you have fresh key limes)
the zest of one large lime or 3 key limes
Confectioners sugar for dusting

Directions

Cream together the butter, sugar, eggs, lime juice, and salt. 
Sift together flour and baking powder. Gradually add in. 

Add in extra flour if needed to get kind of a loose play dough consistency. Not quite stiff but not runny.  

Drop onto a non-stick or VERY lightly greased baking sheet in about 1 tsp amounts. 

Bake at 350F for around 10 minutes. The tops will turn just a tiny touch darker and they'll puff up and kind of shape into these cute rounds. If they spread thin at the edges, don't grease the sheet. 

Take off the sheet and place on a clean towel to cool. Let them cool about 5 minutes and dust with powdered sugar lightly. 

Oh sooo good! 

I would post a picture but I ate them all. My sincere apologies.

Liquor is Quicker but Tandy is Dandy!

I had a craving. It was one of those childhood cravings you can't get away from til you have it. Peanut Butter Tandy Cake. Now all you folks not familiar with TastyKake may have never heard of this spongy cakey concoction. Well I'm here to tell you all about it and trust me when I say you will never forget it! I will say that my version is slightly different than the packaged one so if you were a fan of the Tandy Cake from day one you may be in for a bit of a change of pace. But trust me on this, it's damn good. 


Ingredients

4 eggs

2 cups sugar
1 tsp (I dump in more cause I like it) vanilla extract
2 cups AP flour
1 tsp baking powder
1 cup milk
2 tbsp butter
Peanut Butter (this is your judgement call, use as much or as little as you like)
1 German chocolate bar (substitution of a Hershey bar or similar item is acceptable)
about 1/4-1/2 cup Nutella
Chocolate Chips for decoration

Mix together everything except Peanut Butter, Chocolate, and Nutella

I bake it in two pans for the sake of having extra crusty parts. I use a 9x9 metal baking dish. Make sure your oven is preheated to 345F or so. My oven runs hot so I knock it down just a bit to prevent it from scorching. Lightly grease and dust the pans with flour, pour the batter in evenly. Bake for around 25-30 min or until the top turns kind of a light golden. 

As soon as it comes out, scoop your peanut butter on top about a tablespoon at a time evenly over the top. Spread it around a little at a time. It melts from the heat of the cake into a nice even layer. 

Now let it cool for about 15-20 min. 

In a double boiler or microwave safe bowl mix together the broken bar of German Chocolate and the Nutella. Melt until smooth and then spread evenly over the top of the peanut butter. 

Add a grid of chocolate chips over the whole cake about an inch apart so you have cutting guides later. It makes them super cute to serve. 

Let everything cool for at least an hour. (You can totally speed it up in the fridge or freezer though)

Spray a knife with cooking spray and cut into inch-ish squares. 

Enjoy with your favorite drink whether coffee, milk, or tea. :)


Sunday, January 6, 2013

Beans! Cuban Beans!

I felt the need to stock up on some extra iron this week so I went to an old standby my Mom used to make for me. Comfort food, ahh! 

It's simple and delicious and you'll love it! 

Ingredients: 

1 bag or 2 cans of black beans (if using dry, prepare as you normally would) 
3 potatoes, peeled and cubed
1/4 cup diced onion
1 clove garlic, diced
2 packets Goya Sazon seasoning
1 bunch of cilantro, loose chopped
1 whole fresh tomato, diced
salsa verde
sour creme
sliced green olives
finely diced onion

1 cup rice per person (if using regular rice ratio is 2 parts water to 1 part rice, if making quick rice, follow the box) 

Placed the peeled and cubed potatoes in a decent sized pot and cover with water. Add in 2 packets of Sazon, 1/4 cup diced onion, and clove of garlic. Place on high and let boil for 5-10 minutes until the potatoes are about 3/4 cooked. You will see them change colors a bit. 

Add in the beans and cook until they're soft, anywhere from 5 - 15 minutes depending on the bean. You should have a nice dark broth with your beans and potatoes now. 

Remove from the heat and add in some cilantro. Taste and add salt if needed, but not too much if you like the olives (like I do). They add a good saltiness to it at the end. 

Place rice in the bottom of a nice deep bowl and ladle over the beans and potato. Add a nice dollop of sour creme in the middle, sprinkle on some tomato, salsa verde, onion, and olives. Sprinkle generously with cilantro! You can add some nice Jalapenos too if you like. Although I will say they tend to overpower the whole thing. I haven't figured out how to add enough to get the heat but not too much to kill the subtle flavor of the beans and potato. 

Here's what mine looked like. I forgot cilantro at the store (will be rectifying that tomorrow!) so imagine it on there for me. 


It was really delicious. The best part is for you preggers or anemic folks, the potato and tomato contains lots of nice vitamin C which is necessary to digest the iron in the beans! Tada! Healthy blood! It's a nice rounded meal with lots of good stuff for you and easy to make. You could even do it in the crock pot (or mini crock pot) if the mood struck. 

Wednesday, December 26, 2012

Dinner for 1

Going through my current "lifestyle change" has left me with the quandary of what to nourish my system with... Typically, this time of year I make at least one pot of soup a week and eat off that for a while... My housing situation has changed and I am not as free to make those decisions as I once was (and hope to be again in the not-too-distant future). I have been left with making GF pasta (which gets old really fast) or purchasing frozen dinners. Now, don't get me wrong, frozen dinners have come a long way from the cardboard crap of the past... With steam bags and trays, frozen dinners seem a mighty good (and healthy) option... However, with my dietary restrictions, I can only eat about 1/5 of the offerings, and of those 1/5, I usually only buy 1/4 based on my own tastes... You can see where things get challenging and I end up just going to McD's and getting a plain bacon cheeseburger...

Case in point - I purchased a potsticker entree for my lunch one day... It had red peppers in the "veggie mix" but I was willing to overlook that addition and just pick them out... I also neglected to read the KIND of potsticker that was listed on the front... Getting a tofu one instead of chicken or pork is kind of a let down... Since I was the stupid one who didn't read the package all the way, I made myself eat it... or at least I tried to eat it... The potstickers tasted like sweet and sour feet and the "veggie mix" was entirely made up of red peppers... Yuck!

I had an epiphany! I can purchase potstickers that I like, add some frozen brown rice, and the veggie mix of my choice and make my OWN frozen entree! So I got a small bag of chicken potstickers (a little bit healthier than the pork variety, but still tasty) and some already-frozen brown rice. I added about 1/2 cup of the brown rice to the bottom of a plastic container and added 3 potstickers on top (the # 3 came from the amount in the original "tofu" packaging). Then I topped off the container with broccoli. **IT IS VERY IMPORTANT THAT ALL THE INGREDIENTS STAY FROZEN... MAKE THESE, THEN EITHER MICROWAVE IMMEDIATELY OR PUT THEM BACK IN THE FREEZER**
Still frozen, with a bit of sauce added....


Now, I know that this is NOT a GF dish - the potstickers are made with flour... But since I'm allowing myself to eat the potstickers, I prefer to keep it "gluten-lite" and use teriyaki sauce made with tamari rather than soy... It's a personal preference. If you have a better "sauce" then by all means use it... Pour some over the potstickers (to add a bit of moisture to the skins while they cook) and a bit over the broccoli... Then put the lid on and stick it in the freezer for future use... Don't go overboard or your rice will be overloaded with teriyaki sauce and it probably won't be as good. BTW - Yoshida's sauce would probably be awesome on these!

Cooked, and ready to eat!
When you are ready to eat it, just open up one of the corners of the container to allow it to vent and microwave for around 5-6 minutes... This is very easy to put together and keeps well in the freezer. Great for a night when you are by yourself and don't have the time or inclination to cook a meal... And this way, you know pretty much what went in to it (other than the potstickers, of course) because you picked all the ingredients yourself. Season however you want... I typically add just a bit of black pepper...

Tuesday, December 4, 2012

Entertain Me


These olives are really good and easy to find. The yogurt was delicious too. Try the strawberry. Found at your local Kroger or Fred Meyer family of stores. Next time you're late for a family function or party, grab some of the private selection and be entertained.

Thanks BzzAgent for introducing me! 

Chicken's Done!

Want a quick easy alternative to marinating your own chicken? Try Purdue Oven Ready Roasters. :-)

BzzAgent sent me some promo materials. Thought I would share.


Sunday, December 2, 2012

Raid the Fridge Bruchetta

I can't remember if I've spilled the beans here yet or not but I'm about 18 weeks pregnant at this point. (Translation - a little over 4 months along) Although I'm not experiencing the "normal" pregnancy symptoms all the books seem to talk about (frankly I feel like I'm totally allergic to pregnancy), I am starting to get a bit more of an appetite. I was hungry this afternoon and my cravings seem to center around things with HUGE flavor and that stay rather healthy.  I think I got lucky on that one. Hopefully the little one feels the same way. Either way, I did some fridge diving and came up with an old favorite I haven't made in quite awhile. It's quick, easy, and requires very little cleanup. These are all big plus signs for me so I'm going to share in case you feel the same. :-) 

Easy Bruchetta

-  Nice thick Italian or French Bread, sliced on the diagonal - my slices ended up being    about 4 inches across - average 2 pieces per person
-  1 clove fresh garlic, smashed and diced
-  1/4 cup finely diced onion
-  8-10 fresh basil leaves (estimate, it's ok), julianned
-  2 nice tomatoes, diced small (this will make about 5-6 slices)
-  2 slices of Capicola ham per serving - you can probably substitute any cured meat here, we just like capicola
-  a good quality balsamic vinegar
-  a good quality extra virgin olive oil (I noticed the irony too)
-  a pinch or two of salt
-  fresh grated Parmesan (again, optional but fantastic!)


Mix together the tomato, basil, onion, garlic, and a pinch of salt in a small bowl. 

Lay the bread out on a cookie sheet or your toaster oven pan. I like the toaster oven because it's a little easier to control and way quicker. 

Spoon the tomato mixture onto the bread evenly across all slices. 

Chop up the Capicola and sprinkle on top of tomato mixture. 

Drizzle each slice with balsamic and olive oil in about equal amounts. 

Place under broiler (or on broil in toaster oven) for 5-6 minutes. Keep an eye on it and when the exposed bread turns a little golden it's ready. The Capicola will also start to bubble and get crisp. It's like bacon but better! 

Take out and using a spatula transfer to a plate. Grate some Parmesan on top and add just a pinch more salt to finish. Salt is optional but I think it's rather tasty with it combined with the tomato. 


My Description of one serving


How much I actually ate, and savored every bite!


You get your essential oils in the garlic and olive oil, some spice with the basil and balsamic,  vitamins in the tomato, and well other than that it's just good! It's a great lunch or dinner. It's also really good paired with some mixed greens with a little of the balsamic and oil drizzled on top. Add a dash of oregano and it become spectacular. 


Thursday, November 22, 2012

Thanksgiving Traditions...

Family lore states that this recipe was concocted by my grandmother (Charlotte, of peanut butter fudge fame) and her mother... in a time when people didn't waste a thing...

While making pies for a holiday feast, they ended up with extra pumpkin pie filling and extra apple pie filling... Not enough to make individual pies themselves, but too much to waste... So, in a moment of GENIUS they layered the apples and pumpkin and created the "PUMPLE PIE"... It just isn't the holiday's in our house without one...

Last year, I made a really AWESOME version and posted it on my "original" blog... I could not find any sugar pumpkins in the store this year, so I wasn't able to make it "from scratch" but I still wanted one... So I made an acceptable version...

Ingredients....
The players: Libby's Pumpkin Pie Filling (which I don't usually like to use, but I was in a hurry at the store and couldn't find the "real" pumpkin stuff so I made do with this), Pre-made Pie Crust (I usually like Marie Callender's but, again, I was in a hurry and it looked like they were out), Egg-Beaters (I've noticed that when I use pasteurized eggs in the carton, I don't get the allergic reaction that I get when I use whole eggs), Evaporated Milk, Butter, Pumpkin Pie Spice (I prefer this to cinnamon, ginger, cloves, and nutmeg, but you can use whatever spices in whatever quantities you want), Brown Sugar, 4 Apples (Braeburn and/or Fuji - I like mixing my apples for the best combo of flavor). I got the big can of pumpkin that makes one 9" Deep Dish pie... when making Pumple Pies, this particular recipe makes two pies.
First, peel, core, and shop the apples into bite-size pieces.

Next, melt some butter in a pot...

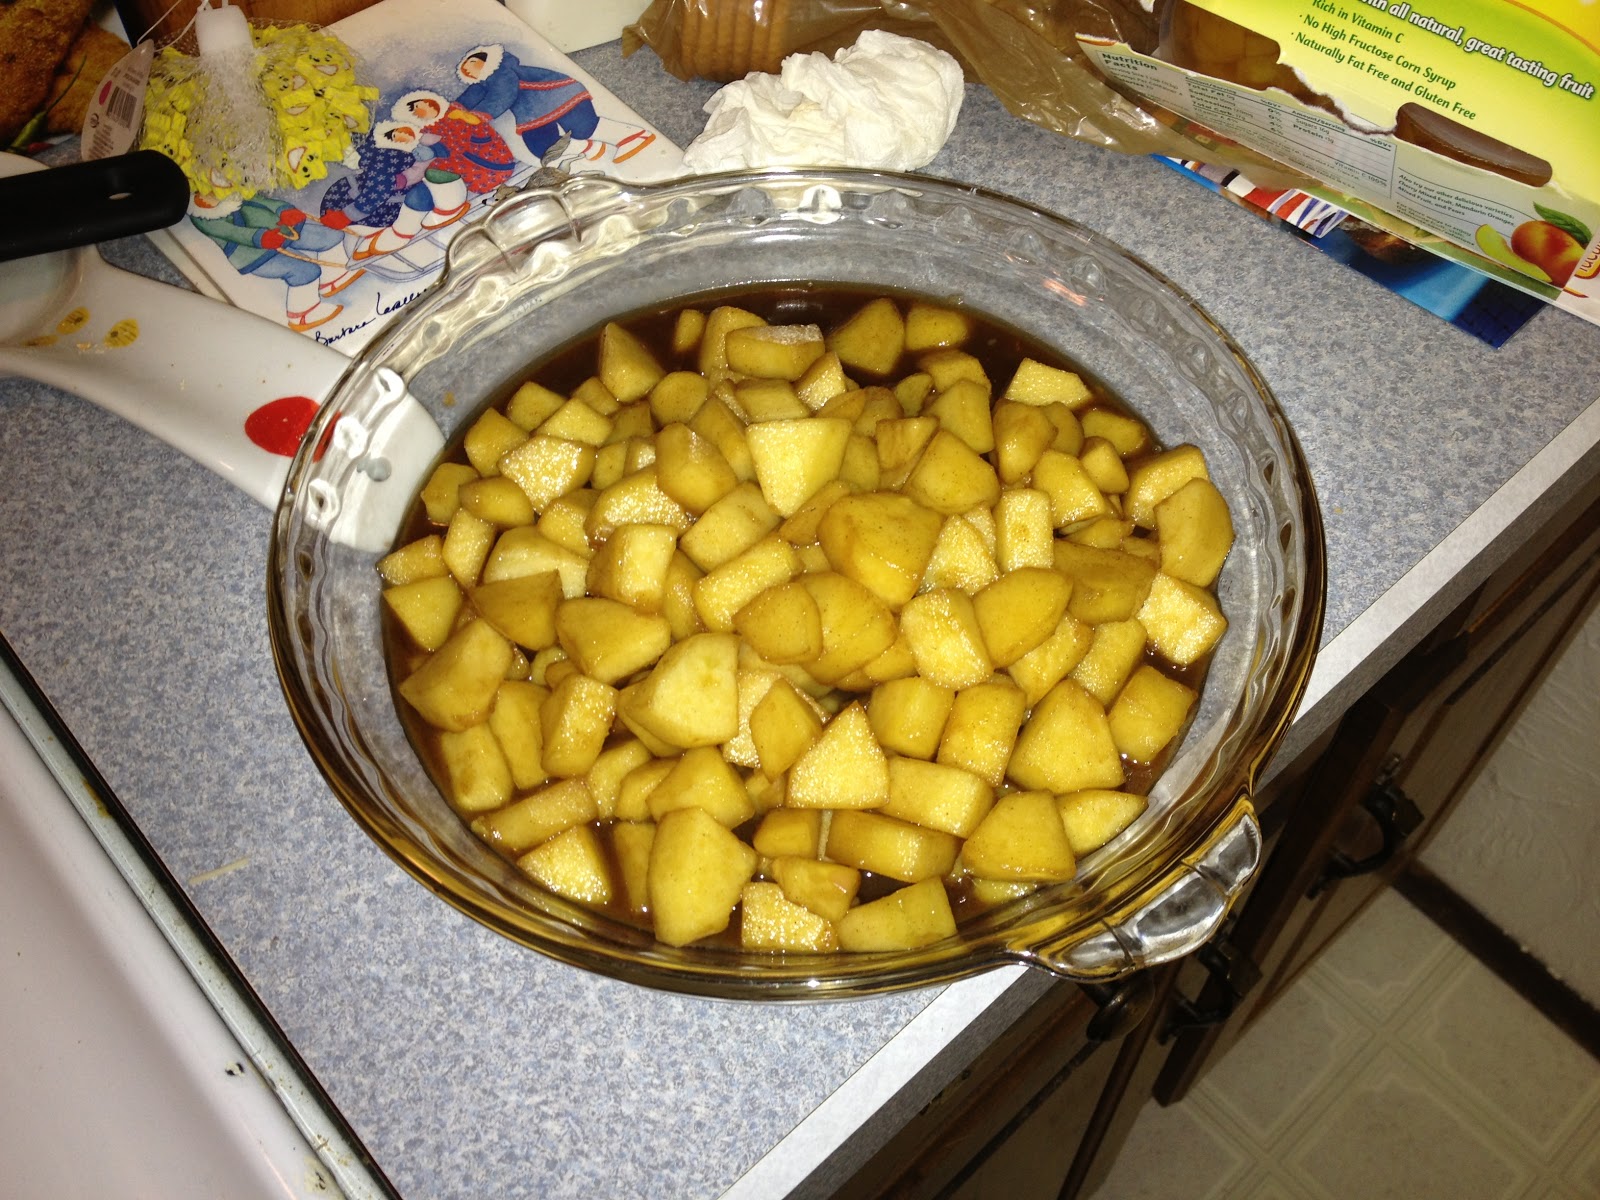
... and add the apples. Saute for about four minutes.

Then, add about 1/4 to 1/3 cup of brown sugar and about 1/4 to 1/3 tsp of Pumpkin Pie Spice and a dash of salt.

Mix well and continue to cook until the apples are tender and the sauce starts to thicken.

Remove from the heat and let cool (I find this works best in a 9x13 glass cake pan, but use whatever you have)

While the apples are cooling, thaw the pie crust and place on a foil-lined cookie sheet (you'll be very sorry if you skip this step). Use a fork to dock the bottom of the pie crust (ie: poke a bunch of holes in it)

Next, add the pumpkin, eggs, and milk to a bowl (using the recipe on the can of pumpkin)

Mix thoroughly to combine.

When ready to assemble the pies, get all of the ingredients together and preheat the oven according to the directions on the can of pumpkin.

Add a layer of apple to the pie crust. You can spoon in a bit of the cooking liquid from the apples.

Ladle the pumpkin on top of the apples... The dark ring you see around the top of the crust is because I added too much apple cooking liquid before adding the pumpkin...
 Put in the oven and bake according to the directions on the can of pumpkin...

Just out of the oven... Now you see why the foil-lined pan is necessary... no one wants to clean their oven ON the holidays...

Let cool ... as you can see, the pumpkin slumped a bit... I did not precook the apples long enough for them NOT to shrink in the pie... Additional apple liquid bubbled up through the pumpkin... But that's only because I added too much to the apples upon assembly...
The finished product! You can see how the layers form...
If you don't want to try to make one of these yourself, just come on over to my house on Thanksgiving or Christmas... I will always have one (or two) around...

Of course, as always, if you have a favorite pumpkin pie filling recipe, apple pie filling recipe, pie crust recipe, etc, please feel free to use your favorites... This tutorial is more a "concept" than a strict recipe.

Happy Thanksgiving Everyone!

Tuesday, November 13, 2012

Quinoa with Roasted Garlic, Tomatoes, and Spinach

Jessie has some quinoa in her panty and doesn't know what to do with it... So I decided to research a few quinoa recipes for her. I found one that interested me enough to try for dinner tonight. You can find the original recipe here, but I decided to modify it a bit. Mainly, I adjusted the roasted garlic part... Jessie told me to roast the garlic at 375 degrees for 25 minutes... Next time I should probably go for 30-35 minutes, but I'll play with that part of the recipe later...
Most of the ingredients... The garlic was in the oven and the quinoa was rinsed by the time I took this picture...

I rinsed the quinoa, also as per directions (it keeps it from getting bitter). Note: either use a SUPER-FINE mesh strainer or use a bowl and your hand to drain the quinoa... the mesh strainer I used had holes bigger than the grain, so a bit went down the sink...
Rinsed quinoa....

As the garlic was finishing, I sauteed the shallots and crushed red pepper. I didn't measure the shallots out, I just used the smaller part of the bulb.... I also didn't measure the crushed red pepper, just eyeballed it... Added the quinoa, as per the directions and then splashed it with some white wine (probably more than the recipe called for but, meh....)
Quinoa, shallot, & red pepper flake mix... after wine...
After the addition of the chicken broth....
Of course, when cooking with wine, it is customary to pour yourself a glass, or two (or three, I won't judge)...
Wine... yummy... I had to have an extra glass since Jessie cannot (preggers)

While the quinoa was cooking as per directions, I took the garlic out of the oven and let it sit for a bit....

Roasted Garlic

Another departure from the recipe - it calls for a chopped, seeded, small tomato... I chose to use grape tomatoes cut in half and NOT seeded... but that was purely my choice...
Halved Grape Tomatoes

When the quinoa was cooked, I added the tomatoes, spinach, and parmesan cheese and mixed it all together...
Mix it all together...

Note: you should probably taste the combination after you add the parmesan and before you add extra salt... I used "full-strength" chicken broth (and not the reduced sodium type) for the recipe... The parmesan is a bit salty on its own and the addition of salt after the parmesan was added was a bit too much for me... Still edible (and tasty), but not as amazing as it could have been...


If you are making this for a side, it makes 4 servings... If you are making it as a main dish (as I was), it makes two...

I will definitely make this recipe again, as it is light enough for the times when I don't want to eat a heavy dinner, and it has a lot of nutritional value... Apparently, quinoa is high in protein, so it is good for "meatless" nights... It is also awesome for any garlic lover... It is awesomely garlicky!

Monday, November 5, 2012

Fabulous 15 Minute French Onion Soup

Pregnancy. It comes with lots of stuff but for me its filled with nausea, food aversion, and weird cravings. Oh yeah, and insomnia. That's where this recipe came in.

We cancelled cable awhile back. We weren't watching it and quite frankly most times I don't miss it. We Netflix now. :) That being said, when you're awake at 2 am there is VERY little on in rural Mississippi. We have religious programming, infomercials, bad newscasts, and PBS Create network. That last one is a savior for me. They are like HGTV without the vapid ugly decorating whores. Mostly though, at night, they rerun the fantastic episodes of French Cooking with Jaques and Julia. This is perhaps my favorite show of all time.

The episode on was for many things like delicious Choux pastry from which cream puffs and wonderful turnovers and danishes were made (that to come later). They also made a wonderfully simple onion soup. So I have had this craving for 2 days now. It's easy, takes like no time at all and tastes wonderfu1!

Fabulous 15 Minute French Onion Soup (for one)

1/2 large onion, large diced
1 can or 1/2 carton good beef stock, I go with Swanson or Kitchen Basics
3 healthy slices of a good french or Italian bread, we had some for making deli sandwiches in the house (note: don't use loaf bread here, go splurge the $1-$3 at your local bakery for good bread. It's totally worth it)
 1 1/2 cups Cheese, it calls for Gruyere but I didn't have that so I mixed a nice salty goat cheese and parmigiano
salt and pepper to taste (liberal)
1-2 tbsp butter

Depending on the size of your pot, put in enough butter to cover the bottom thinly when heated. Turn heat to high and add in the onion.  Sprinkle on a decent amount of salt. Crush some peppercorns and add. Saute until the onions are translucent.

Add in the beef stock and bring up to a nice rolling boil. Reduce to medium heat and add in half the cheese. Stir constantly until melted. it only takes a minute or two. Taste and adjust the salt and pepper as needed. Remove from heat.


I used my toaster oven to toast the slices of bread. Break them up and put them in the bottom of a nice bowl or crock. Add the onion soup over the bread. Sprinkle the remaining cheese on the top. Put the whole bowl in the toaster oven on broil until the cheese bubbles.

Wait a few minutes, hot cheese burns your mouth. It's quite delicious!

I never knew it was quite that easy but it makes a nice easy meal for one or two! (Jeff goes sin cebolla)


Wednesday, October 31, 2012

Pumpkin Pie? Why yes please!

My friend Kadee sent me this recipe. I, of course, tweeked it to make it super delicious. And come on, who doesn't want to drink pie! 

Makes a wonderful easy treat while watching for trick-or-treaters. 


Ingredients:
1 cup pumpkin puree (I used what we had left from last years Halloween pumpkins I had painted)
1 very ripe medium-sized banana, you can use the frozen ones you forgot about in the freezer

cup fat-free vanilla yogurt, my favorite is a greek style
2 tbsp honey (We were out of honey and the honey dude hasn't called me back so I used Karo Syrup)
1 cup milk or cream, you could use any sort of liquid that suits you, I just went off of the standard pie recipe

a splash of Mocha or Chocolate flavored coffee creamer, totally optional but why not?! 

3/4 tsp Penzey's Baking Spice
a splash of vanilla extract
a handful of crushed ice

Toppings:


Whipped Cream


Candy

Throw everything in a blender. Make sure you remember the lid. Throw that puppy on high speed and let her rip! 


Pour into a lovely glass, preferably with a straw. A scoop or squirt of whipped cream on top and your favorite tiny candy crumbles on top. Perfectly festive! 

Saturday, October 20, 2012

Redemption Spelt Berry Apple Pear Salad

This isn't an original but it's my tweeked version of a recipe found here: 

http://kitchenkathleen.blogspot.com/2008/03/apple-and-spelt-berry-salad.html#


It's so delicious and reminds me of good times in Florida. It was a regular purchase from Native Sun when I lived there and I missed it so bad I went searching for the recipe. 

Apple, Pear, Spelt Berry Salad

1 cup cooked spelt berries
1 pear, large diced (any variety, I liked the green ones)
1 apple, large diced (any variety, I LOVE granny smith but used Gala because it was handy)
about 1/4 cup celery, sliced thin
1/2 cup dried cranberries, soaked in about 1/8 cup water to reconstitute a little
1/3-1/2 cup greek yogurt, plain or vanilla work
2 tbsp cream cheese
1 tbsp lemon juice
2.5 tbsp honey, sugar, or karo syrup (I used karo because I didn't have any honey left, but honey tastes better)
1/2 tsp Penzey's Baking Spice (or something similar

Cook the spelt berries. Boil 1.5 cups water and add  in 1/2 cup dry spelt berries. Cover and let simmer for about 40 minutes. Turn off heat, leave covered, let cool. 

Mix the wet ingredients together until kind of soupy. 

Toss together dry ingredients until mixed well, including spelt berries. 

Combine everything into a nice serving dish or storage container. 

Keeps in the fridge for about 5 days pretty well. After that it gets a little soggy. 

You can substitute something like a kamut berry or even some almonds, cashews, or walnuts if you can't find spelt. I just ordered mine from Vitacost.com. It's a great site and clicking through here should get you a free $10 credit! 

It's a perfect breakfast, meal, or snack. 


Thursday, October 18, 2012

This is what happens when I don't cook... crappy food and a worse experience!


Today my husband and I decided to try the local Pizza Hut in Starkville MS. As we entered the restaurant we immediately noticed that the decor appeared quite rundown and in a state of disrepair. The tile in the entrance was cracked, loose, and uneven so bad I tripped. The bathrooms were that of a 3rd world country with cracked bowls, no soap, and not even attached toilets! We should have turned around and left but my husband suggested we stay since the buffet appeared to be in better shape. It's pizza right? What can go wrong? After we were rudely seated by a woman who didn't bother to greet us at all but showed her horrible manners and "threw" the silverware on the table before turning around and walking away. We later learned, she was our waitress, or what should have been. She didn't do anything but throw a check on the table. The seats were badly torn to where they pulled at our clothes, my husband felt something poking him, turns out it was an electrical outlet hanging out of the wall with loose wires hanging from it! 

During our meal we were seated by a pair of women with small children. They were so disinterested in attending to the needs of the children they both screamed and yelled for nearly 30 minutes. This included the women yelling across the restaurant to employees who carried on a conversation. Apparently they thought they were at some sort of family reunion or something. Several other patrons exchanged glances of dismay but continued their meal as quickly as possible to leave. When I stood up to ask them to quiet the child down a bit so we could enjoy our meal, the two women became irate and started to defend their actions stating "children can't be trained". Maybe not theirs, of course they couldn't be trained either... Several employees (that had been yelling across the restaurant, came running over and out from the kitchen, all appearing to be friends. As the scene developed one employee wearing large hoop earrings and a red polo shirt actually physically bumped me with body language leaving no doubt she was wanting a physical altercation to ensue. At this point she started screaming and asking us to leave so I lost it and threw my bill at her (no I did not hit her, it's a piece of paper smaller than an iPhone). This resulted at her lunging at me and about knocking a table over screaming obscenities. 

An off duty police officer intervened and escorted me out of the building as the crowd was ready to draw blood while my husband paid the bill. All of this because someone asked a parent to be a parent. Several other patrons confronted me in the parking lot and said they were about to do the same thing (yeah, right) but didn't. 

Now we've traveled all over the world and been treated like crap by a lot of folks. Most of the time I can take it. This shot me over the edge. I will NEVER patronize another YUM! Brand foods family of stores again! I encourage you to do the same... 


Tuesday, October 9, 2012

Chicken Corn Soup

I promise, if you make this, you will LOVE it! 

1 whole chicken
4-5 stems of celery, diced
5-6 carrots, diced
1 whole medium onion, diced
4-5 cloves of garlic, minced
4 cups corn (can be frozen or fresh, don't use canned)
3 medium potatoes, diced
3 eggs
salt and pepper to taste
1-2 tbsp olive or grape seed oil

Put a rinsed whole chicken in a stock pot, cover with water, boil until falling apart. Remove from heat and let cool. If you do this the night before and put the whole pot in the freezer you get a nice layer of chicken fat on the top of the stock. I use this in place of oil in the next few steps. If you don't have time, no worries, use the oil. 

In another large stock pot add the 1-2 tbsp of oil to the pot and put on a medium high heat. Add in the garlic, onion, celery, and carrots. Saute until soft. It's ok if the bottom of the pot starts to caramelize a little. That means its' building good flavor. Spread everything to the sides and add in the potatoes to the center. You may have to add a touch more oil to combat the startchy-ness. Salt and pepper liberally to build the flavors. I use somewhere around 1 tbsp of each. 

When you get everything soft, add in the stock from the whole chicken pot. Pull the chicken out and remove bones. Cut or pull into small pieces. Add the chicken to the pot.

Add in the corn and the three raw eggs. After about 10 minutes, scoop the eggs out and let them cool a touch in a bowl. Peel and dice then add back to soup. 

Let everything get happy for another 10 minutes or so and serve. This is one of my favorite recipes from being a kid during harvest season. Plus it's how my husband and I spent our first date! He was sick, I made him this. 5 years later we're married and expecting our first baby! :-)

Monday, October 1, 2012

Cool Weather Grub!

Fall is DEFINITELY in the air here in Juneau. It was 36 degrees this morning when I took the hubby to work... You know what that means? I can FINALLY cook soups & stews for dinner! Yay! I am trying to convert my husband over to my way of thinking when it comes to the awesomeness that is a pot of delicious soup... He maintains that "soup is not dinner" but I can usually get him to eat stew or chili with few complaints.

Earlier today, I had a craving for lentil soup. To satisfy my craving, I went to the store to get ingredients while I had a bit of time between when I got off work and when Aaron got off work. While wandering the store, I saw a bag of baby yukon gold potatoes... and changed my mind (I just couldn't convince myself that I could successfully add potatoes to lentil soup). So I could use the potatoes that I immediately craved upon sight, and so I could get Aaron to eat it, I decided to make chicken stew.

Another good thing about soup weather? You don't really need a recipe... Just a good understanding of what tastes good together...

Heat some olive oil in a dutch oven (love my Lodge Enameled Cast Iron one). Cut one chicken breast into cubes, season with salt & pepper, and brown in the oil. When browned, remove the chicken and set aside. Add a bit more oil and then add one red onion, two stalks of celery, and two carrots (all chopped) and cook until the veggies start to soften. Add the baby yukon gold potatoes (roughly quartered, but it depends on the size of the potatoes... just make sure they are about the same size, but not too small, or they'll be mushy) and the chicken. Season with more salt, pepper, and about 1 tsp. of an herb blend (I used herbs de provence, but you can use whatever you like). Then, add 1 quart of chicken broth and let it simmer with the lid on over medium heat. Cook until the potatoes are soft. Mix in some cornstarch (mix it with liquid first, or you'll be sorry.... I used some white wine I had lying around). Thicken it to the desired consistency (Aaron likes it thick, so I used about 2-3 tbsp of cornstarch, but 1-2 would probably be fine). Taste for any additional seasoning it may need. Fresh herbs might be nice (but I didn't have any luck with my kitchen herb garden, so I didn't).

Feel free to add anything else you want to it... soup isn't rocket science and it isn't exactly precise... I RARELY measure anything for my soups. And it is pretty rare for me to have a crappy batch of soup.

I didn't get any pictures of the awesomeness, so you'll just have to take my word that it looked and tasted great. Definitely hit the spot for some comfort food. An added bonus? When I plugged the ingredients in to calculate the calorie count of the dish, it works out to a little over 200 calories per serving. We each had 1 bowl and I separated the rest of the pot into two plastic containers. I figure it is about 6 servings a pot, at these quantities. Sometimes I go a little overboard with soup production, but I successfully reigned it in for this one :)


Monday, September 24, 2012

Do you love free stuff? Me too!

Obviously I love trying new things. Food mostly but other stuff too! 

This site is pretty awesome. They fully vet every ad to make sure it's real and it's quick and easy. No signing up to 15,000 things and giving out your blood type and first born. Just a site, with links, to cool stuff! 

So check it out ok? Say I sent you! 

http://www.myfreeproductsamples.com/

I do daily and LOVE my mailbox now!! 

Wednesday, September 19, 2012