Showing posts with label Science Experiment. Show all posts

Thursday, March 21, 2013

Liquor is Quicker but Tandy is Dandy!

I had a craving. It was one of those childhood cravings you can't get away from til you have it. Peanut Butter Tandy Cake. Now all you folks not familiar with TastyKake may have never heard of this spongy cakey concoction. Well I'm here to tell you all about it and trust me when I say you will never forget it! I will say that my version is slightly different than the packaged one so if you were a fan of the Tandy Cake from day one you may be in for a bit of a change of pace. But trust me on this, it's damn good. 


Ingredients

4 eggs

2 cups sugar
1 tsp (I dump in more cause I like it) vanilla extract
2 cups AP flour
1 tsp baking powder
1 cup milk
2 tbsp butter
Peanut Butter (this is your judgement call, use as much or as little as you like)
1 German chocolate bar (substitution of a Hershey bar or similar item is acceptable)
about 1/4-1/2 cup Nutella
Chocolate Chips for decoration

Mix together everything except Peanut Butter, Chocolate, and Nutella

I bake it in two pans for the sake of having extra crusty parts. I use a 9x9 metal baking dish. Make sure your oven is preheated to 345F or so. My oven runs hot so I knock it down just a bit to prevent it from scorching. Lightly grease and dust the pans with flour, pour the batter in evenly. Bake for around 25-30 min or until the top turns kind of a light golden. 

As soon as it comes out, scoop your peanut butter on top about a tablespoon at a time evenly over the top. Spread it around a little at a time. It melts from the heat of the cake into a nice even layer. 

Now let it cool for about 15-20 min. 

In a double boiler or microwave safe bowl mix together the broken bar of German Chocolate and the Nutella. Melt until smooth and then spread evenly over the top of the peanut butter. 

Add a grid of chocolate chips over the whole cake about an inch apart so you have cutting guides later. It makes them super cute to serve. 

Let everything cool for at least an hour. (You can totally speed it up in the fridge or freezer though)

Spray a knife with cooking spray and cut into inch-ish squares. 

Enjoy with your favorite drink whether coffee, milk, or tea. :)


Sunday, December 2, 2012

Raid the Fridge Bruchetta

I can't remember if I've spilled the beans here yet or not but I'm about 18 weeks pregnant at this point. (Translation - a little over 4 months along) Although I'm not experiencing the "normal" pregnancy symptoms all the books seem to talk about (frankly I feel like I'm totally allergic to pregnancy), I am starting to get a bit more of an appetite. I was hungry this afternoon and my cravings seem to center around things with HUGE flavor and that stay rather healthy.  I think I got lucky on that one. Hopefully the little one feels the same way. Either way, I did some fridge diving and came up with an old favorite I haven't made in quite awhile. It's quick, easy, and requires very little cleanup. These are all big plus signs for me so I'm going to share in case you feel the same. :-) 

Easy Bruchetta

-  Nice thick Italian or French Bread, sliced on the diagonal - my slices ended up being    about 4 inches across - average 2 pieces per person
-  1 clove fresh garlic, smashed and diced
-  1/4 cup finely diced onion
-  8-10 fresh basil leaves (estimate, it's ok), julianned
-  2 nice tomatoes, diced small (this will make about 5-6 slices)
-  2 slices of Capicola ham per serving - you can probably substitute any cured meat here, we just like capicola
-  a good quality balsamic vinegar
-  a good quality extra virgin olive oil (I noticed the irony too)
-  a pinch or two of salt
-  fresh grated Parmesan (again, optional but fantastic!)


Mix together the tomato, basil, onion, garlic, and a pinch of salt in a small bowl. 

Lay the bread out on a cookie sheet or your toaster oven pan. I like the toaster oven because it's a little easier to control and way quicker. 

Spoon the tomato mixture onto the bread evenly across all slices. 

Chop up the Capicola and sprinkle on top of tomato mixture. 

Drizzle each slice with balsamic and olive oil in about equal amounts. 

Place under broiler (or on broil in toaster oven) for 5-6 minutes. Keep an eye on it and when the exposed bread turns a little golden it's ready. The Capicola will also start to bubble and get crisp. It's like bacon but better! 

Take out and using a spatula transfer to a plate. Grate some Parmesan on top and add just a pinch more salt to finish. Salt is optional but I think it's rather tasty with it combined with the tomato. 


My Description of one serving


How much I actually ate, and savored every bite!


You get your essential oils in the garlic and olive oil, some spice with the basil and balsamic,  vitamins in the tomato, and well other than that it's just good! It's a great lunch or dinner. It's also really good paired with some mixed greens with a little of the balsamic and oil drizzled on top. Add a dash of oregano and it become spectacular. 


Wednesday, October 31, 2012

Pumpkin Pie? Why yes please!

My friend Kadee sent me this recipe. I, of course, tweeked it to make it super delicious. And come on, who doesn't want to drink pie! 

Makes a wonderful easy treat while watching for trick-or-treaters. 


Ingredients:
1 cup pumpkin puree (I used what we had left from last years Halloween pumpkins I had painted)
1 very ripe medium-sized banana, you can use the frozen ones you forgot about in the freezer

cup fat-free vanilla yogurt, my favorite is a greek style
2 tbsp honey (We were out of honey and the honey dude hasn't called me back so I used Karo Syrup)
1 cup milk or cream, you could use any sort of liquid that suits you, I just went off of the standard pie recipe

a splash of Mocha or Chocolate flavored coffee creamer, totally optional but why not?! 

3/4 tsp Penzey's Baking Spice
a splash of vanilla extract
a handful of crushed ice

Toppings:


Whipped Cream


Candy

Throw everything in a blender. Make sure you remember the lid. Throw that puppy on high speed and let her rip! 


Pour into a lovely glass, preferably with a straw. A scoop or squirt of whipped cream on top and your favorite tiny candy crumbles on top. Perfectly festive! 

Saturday, October 20, 2012

Redemption Spelt Berry Apple Pear Salad

This isn't an original but it's my tweeked version of a recipe found here: 

http://kitchenkathleen.blogspot.com/2008/03/apple-and-spelt-berry-salad.html#


It's so delicious and reminds me of good times in Florida. It was a regular purchase from Native Sun when I lived there and I missed it so bad I went searching for the recipe. 

Apple, Pear, Spelt Berry Salad

1 cup cooked spelt berries
1 pear, large diced (any variety, I liked the green ones)
1 apple, large diced (any variety, I LOVE granny smith but used Gala because it was handy)
about 1/4 cup celery, sliced thin
1/2 cup dried cranberries, soaked in about 1/8 cup water to reconstitute a little
1/3-1/2 cup greek yogurt, plain or vanilla work
2 tbsp cream cheese
1 tbsp lemon juice
2.5 tbsp honey, sugar, or karo syrup (I used karo because I didn't have any honey left, but honey tastes better)
1/2 tsp Penzey's Baking Spice (or something similar

Cook the spelt berries. Boil 1.5 cups water and add  in 1/2 cup dry spelt berries. Cover and let simmer for about 40 minutes. Turn off heat, leave covered, let cool. 

Mix the wet ingredients together until kind of soupy. 

Toss together dry ingredients until mixed well, including spelt berries. 

Combine everything into a nice serving dish or storage container. 

Keeps in the fridge for about 5 days pretty well. After that it gets a little soggy. 

You can substitute something like a kamut berry or even some almonds, cashews, or walnuts if you can't find spelt. I just ordered mine from Vitacost.com. It's a great site and clicking through here should get you a free $10 credit! 

It's a perfect breakfast, meal, or snack. 


Friday, August 10, 2012

Grandma Charlotte's Fudge

Chocolate. Is there any word in the English Language (apart from beer, which incidentally goes fantastic with Chocolate) that cultivates such heartfelt love? I'm happily married to a wonderful guy I love, but I gotta tell you chocolate stirs a passionate feeling so deep it might just trump my nuptials. 

That being said, yesterday I was craving chocolate and was sorely lacking in supply. Of course my first contact was to Jen to help me out. She pulled through. Sort of... See her solution was to whip up some Grandma Charlotte (her's, not mine) Fudge. Now I'm not exactly a fudge making pro. Just to make it a big more interesting, she sends me the directions via a series of Text Messages! 

Here's what I got: 


Helpful right? 

So here's the translated ingredient list: 

1 1/4 cup sugar
2 3/4 tbsp cocoa
1 tsp vanilla extract (this was my addition because I LOVE it)
1/4 plus 1 tbsp milk 
1 cup peanut butter

The Cast
These ingredients probably need tweeked a little. The taste is amazing but it's a little crumbly to work with and Jeff likes gooey fudge. 
Here goes nothin'!

My favorite cook wear is All Clad. I love it. Can't explain it, just do. 

Sift the sugar and cocoa together into about a 6 inch pot. You can use smaller if you like but the more room it has to spread out (without being too thin) the better it will kind of carmelize. Add milk and stir well.  


Cold, Wet, and Sweet - There's got to be a joke there.
Add vanilla. 
I call this "Honeymoon Vanilla".
We bought it at a market somewhere in Mexico.
 Turn the heat on to a medium low. Let the mixture kind of warm up and start to get glossy. Keep on stirring. Think Nemo... 


Concoction Starting to Glaze
At this point, risk of burning is pretty low. So while it heats I recommend finding a dish and lining it with plastic wrap. I know, I know. Deviation from Grandma. But I hate dishes.  Grandma would still be proud. 

Wrap it Up.... 
 Here is about half way done. You can see some of the grainy-ness of the sugar on the spatula. Keep on stirring... 


At about 3/4 of the way through you'll be able to swipe the pan and the mix will hold consistency for a few seconds. 


Swoosh!
 Tilt the pot. If it still looks grainy and lump, keep on stirring. I played with my heat a bit here. Up a little to get the sugar to melt more. Not too high though, it's easy to burn. Burning sugar tastes like dirt... Well, sort of. First it tastes like caramel, then like dirt really quickly. Someone should talk to sugar... 

Grainy like a 90's camera phone.  
When it really starts to come together (this is about 8 minutes in) you'll get a little separation of cocoa and milk fat from the carmely sugary sauce. Keep stirring. I stopped for a second to show this but ideally you keep it all combined. 


I see swirls. 
 You're shooting for around 200 - 225* F. Keeping it there on a medium heat melts the sugar crystals without burning anything. I found this awesome candy thermometer at an estate sale for $1. If you don't have one, no worries. 


Between 200 and 225 it gets this nice black glossy look. You can read your fortune, or maybe just keep stirring and make fudge. Your call. 

Shiny! Squirrel! 
I turned off the heat and removed the pot from the burner just to cool a touch. It was really just because I needed 2 hands to prep my KitchenAid Mixer and Mom didn't have quite enough radiation to produce that third arm. 

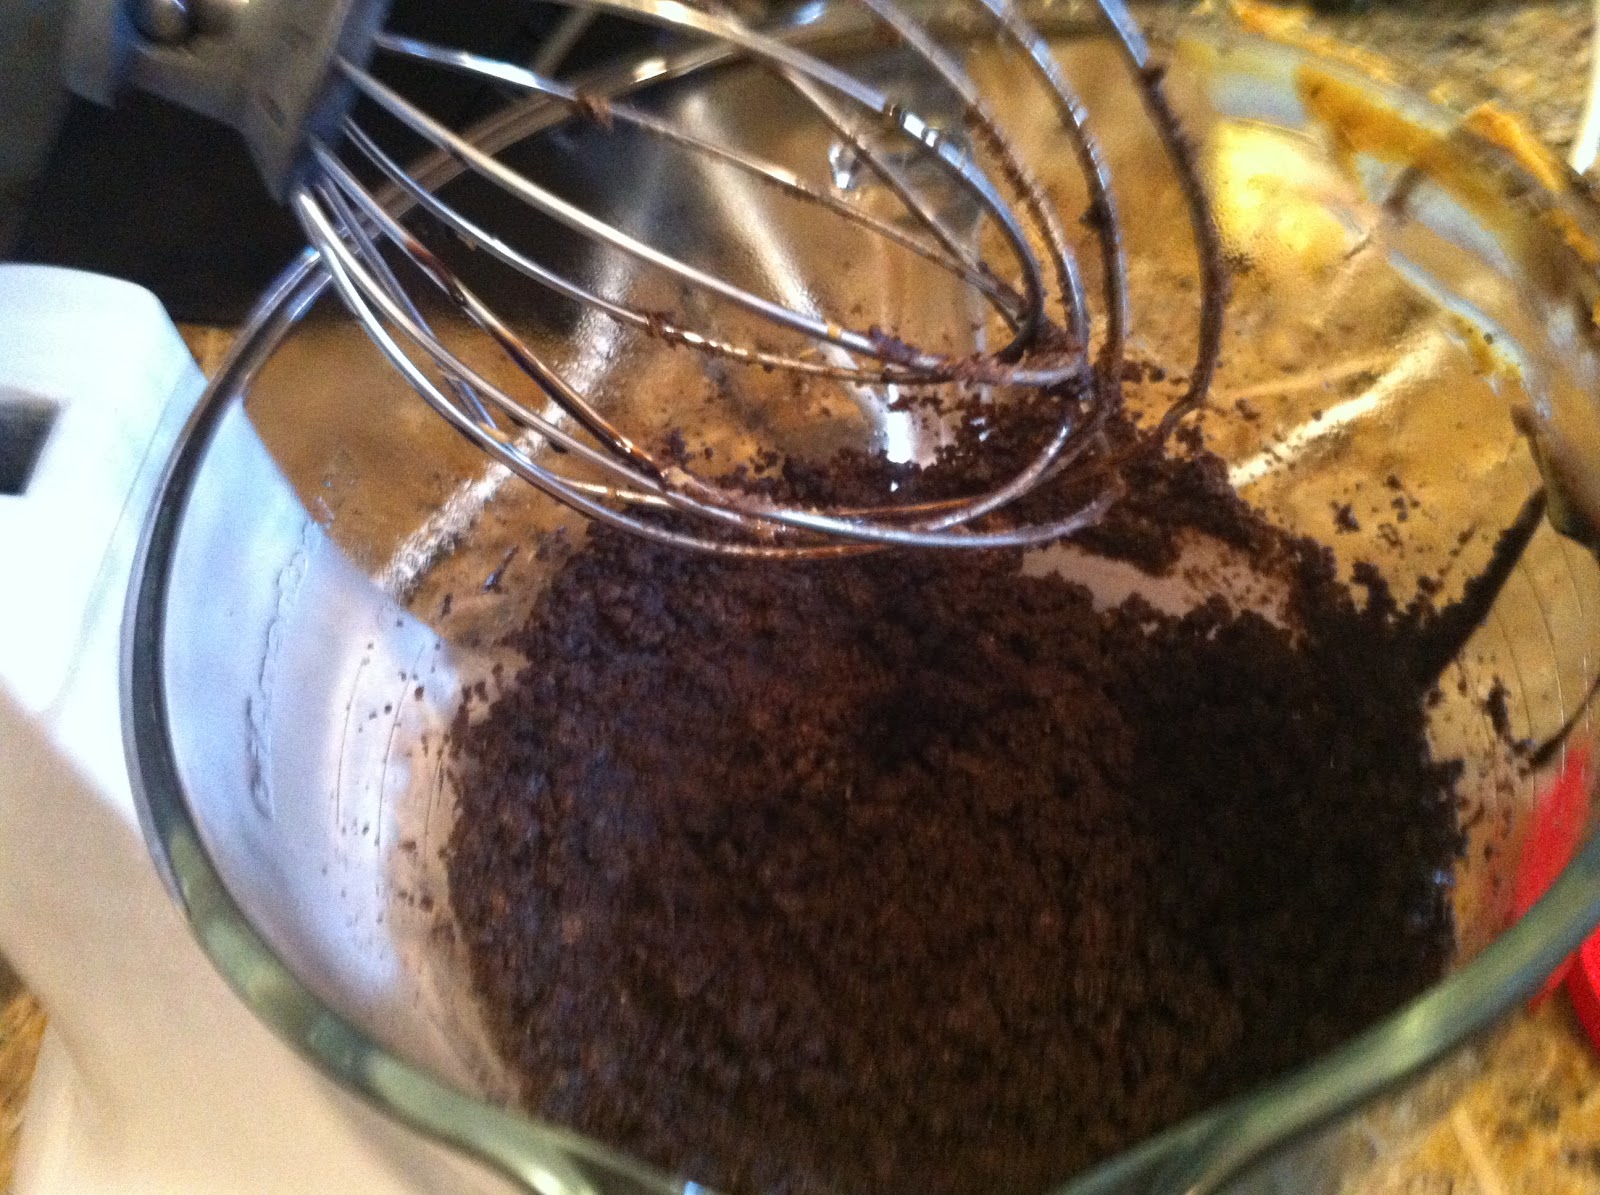
Glass bowl, whisk attachment. 
I would show here putting in the peanut butter but again, no third arm. So here are a series of shots of the mixer combining everything. Put in the peanut butter first, start the mixer, than pour in the sugar/cocoa mix. 

PB in the center, whipping out. 


Whip it, whip it good now. 

It fully incorporates and looks like Oreo Crumbs. At least mine did.

Me Want Cookie!

 Dump contents of mixer bowl into the lined dish. 


Fold over plastic wrap. 


I used a smaller bread pan to smash everything down tight and into the lined pan. You could use fingers if you want. This was quick and easy. 


Flipped the now-fudge out onto the marble counters, keep the plastic wrap on. 

Practice Safe Rolling. Prevent dirty counters. 
 Using a rolling pin, I smashed it out a little thinner. 


Purely Illustration. 


About as thick as a pen. 
 Get ready for my favorite part! I brewed up a cup of Brooklyn coffee and enjoy! 


Three of my favorite things! 

So here's to you Grandma Charlotte. And a big thank you to Jen for making my morning a little better! 


Monday, August 6, 2012

Cheapskate Chicken Dinner

Today in Mississippi it's been stormy. My joints are not a fan. I, however, am! The boy went to work today and I have been dragging myself around the house all day trying to accomplish things. That has not gone well. Dishes, yeah. Laundry, yup. Made the bed, cleaned the bathroom. Still, not one of my projects on the almighty white board has been crossed off. Why? I haven't a clue!

Now about noon every day he calls to check in. Today's Topic O' Discussion was dinner. A few weeks ago Kroger had some awesome free range chicken on sale. Folks around here seem to like the extra large family packs and didn't quite realize that the price per pound of the really good free range stuff was LESS than the over-processed over-packaged force fed birds. So for a pack of 6 chicken drumsticks I paid about $2. I took them out of the freezer yesterday night and wasn't quite sure what to do with them until about lunch. 

My brilliant idea was "shake n' bake". Of course by now you know I am not a fan of that prepackaged crap so I figured, Yeah, I can totally make my own. I started by rinsing the chicken and patting it dry with paper towels. Throw it in a bowl and add about a cup of milk and a good healthy amount of tabasco. I also added in a pinch of oregano from the garden and some Northwest Seasoning from Penzey's. Let it sit in the fridge for at least an hour but up to like 12 hours is fine. 

In the mean time... maybe have a beer and then prep this next step. 

Find a quart or gallon sized ziploc bag. Add in equal parts of flour (yes Jen, you can use GF easily for this!) and corn meal (not sure if that's GF, if not just double the flour), add in like a good tablespoon of Northwest Seasoning. If you don't have that, just kind of mix together some pepper, paprika, salt, black pepper, and cumin. You could also do a season salt of some kind. Basically whatever you wanna eat, ok?! Geez, you guys are picky! 

Shake that mixture up pretty well. Pick the chicken up from the milk and shake it a little over the bowl to get the heavy liquid off. Then put the piece in the bag and shake until it's covered. I like to do them individual for a nice even coating and no lumpy bits. 

Place the chicken in a glass baking dish, make sure the pieces aren't touching. Now add in about 2 tbsp of butter and 2 tbsp of lard. Yeah, I get that most folks these days aren't into "fat" but if you're gonna make this right, kick your conscious in the ass and go get some lard. TRUST ME! 

Now bake for 30 min at 350. After 30 min, jack the heat to 450, flip the chicken over and bake another 15-20 min until golden. And for the love of all that is food like, please use SKIN ON BONE IN chicken. You can be prissy and peel skin off later but for now, leave it on. Skin and Bones are where the flavor comes from. 

It will come out all sorts of yummy and taste sort of friend but has like WAY less unhealthy junk. Plus c'mon. The total cost for the whole dish for me was like $2.50. 

I also made some mashed taters. This is my one exception to the boxed food rule other than cereal. I love Idahoan potatoes. The box lists the ingredients as potato. That's it, just dehydrated potato. Yum! Boil some water, add in a hunk of butter and some garlic salt. Mix in the potatoes. For like $0.45 and 5 minutes you can have delicious potatoes. I love to add milk and sour creme sometimes too. Depends on how far you want to take this one. 

Some steamed green beans done in the microwave and it was cheap, simple, and surprisingly healthy. Did I mention it was damn good? Yup! 

I'd have taken a picture but we ate it too quick. Sorry!!! 


Tuesday, June 19, 2012

Bluberry Oops Bread Pudding

I made an attempt to make some blueberry muffins. For whatever reason, they didn't turn out like they normally do. I blame brain farts. I didn't think they were bad but Jeff said they tasted like corn bread blueberry muffins. Ehh, either way, had to fix them or throw them away. I'm cheap so pitching wasn't in the cards. Soooo....

Blueberry Muffin Bread Pudding

4 Eggs
1 cup milk
1/2 cup granulated sugar
1 cup dark brown sugar
1 dozen poorly made blueberry muffins, cut into pieces
1 tbsp vanilla

Wisk together the eggs, milk, sugars, and vanilla. Pour over the muffin cubes in a bread pan (preferably glass).

Bake at 370 for about 40 minutes or until it's firm and no longer jelly like.

You can drizzle with glaze if you want but it's completely un-necessary.

Bon Apetite

Monday, February 6, 2012

Epic Fail!

Jessie is going to have to see if she can make sourdough bread... Apparently, I cannot to save my life... The starter recipe worked well, but when it came to actually making the bread, the dough didn't rise like it should have, one loaf stuck to my loaf pan, and the other that was going to be baked on my flat stone spread out to about 1/4 inch... Sigh...

I did sample some of the flat bread and it was OK flavor-wise. The edges were super crispy, so the puppies got to eat some too...

I took some more pictures, and will post them later tonight, as I am at work at the moment.

I guess we are going to buy Grandma Dora's sourdough loaf.

Thursday, February 2, 2012

Science Experiment, Day 3

When I woke up this morning, I couldn't help but peek in on my little science experiment. It had a few bubbles on the top... I took this to mean that everything was going well...

When I got home from work, I noticed that it had pretty much doubled in size and was very bubbly... Just like the description in the cookbook! Yay!
Evil sticky dough has transformed into evil smelly foam...
After "the thing" has been fed...

Had to feed it again (same proportions as before) and cover. I'll feed a few more times (about every 12 hours for the next few days) and by Saturday, it should have a sour tang to it... Right now, it just smells rank...

Wednesday, February 1, 2012

Science Experiment, Day 2

So, 12-15 hours after initially making the starter, you are supposed to feed the starter with the same amount of flour and water as before. I may have undercut the time by an hour or so... I made the starter pretty late last night and I had to go to work this morning, so I don't think it was QUITE 12 hours... I didn't take pictures this morning partly because I was running late and partly because it didn't look any different than the night before, just a slightly larger ball of sticky dough...

After another 12-15 hours (this time I waited about 13.5 hours before I started messing with it), you need to transfer it to a larger clean bowl and feed it again just like the morning feeding.
From one bowl into another...

Yeah, it just makes yet another slightly larger bowl of sticky dough, although at this point, it does have a discernible odor... Kind of like when you leave bread dough out too long before baking bread... Not unpleasant or unexpected, but it does have a slightly-off scent about it... A little more pungent than regular bread dough. Hopefully this means that all is going well...
After the second feeding...

I did learn that my nice old mixing bowl won't let plastic wrap cling to its edges... I thought that maybe I couldn't reuse my already-holey plastic wrap that I used on the other bowl, so I tried a clean piece... It didn't cling either... So, rather than fight it, I'm going to overlook the instructions of "cover tightly with plastic wrap" and settle for "loosely cover with plastic wrap"... I did poke a few holes in the new sheet, just for giggles.
Loosely covered counts, right?

Now, we wait 24 hours (approx. 8:30 PM tomorrow)... It should be bubbly... If not, then we try again!

Tuesday, January 31, 2012

Science Experiment, Day 1

Apparently, Aaron's Grandma wants sourdough bread and his father is supposed to deliver it to her after his visit here later this month... Crap... I am SOOO not a baker... However, I did guilt Aaron into buying me a professional grade Kitchen-Aid stand mixer just so I can make bread... Double Crap... He even gave me some "sourdough starter" with the mixer, to get me started... I used the excuse that I don't have a sourdough crock for my fridge to avoid using it... I no longer have that excuse... (Thanks again, Jessie!) I can't bring myself to use a product that is sold to the tourists pretty much as soon as they get off the cruise ship for a buck... And, since I can't say "No" to Grandma Dora and don't know anyone who already has an established starter, I decided to make my own starter.

This lead to me scouring my library for the perfect sourdough starter recipe... Hi, My name is Jen, and I'm addicted to cook books... (this is where you say, "Hi, Jen!"... you know, just in case you've never been to one of these meetings before)

I consulted the Holy Bible of cook books (at least in my humble little library)... The Joy of Cooking... It has quite a few starter recipes, one that uses yeast to get it going and one that allows it to ferment (sour) over time... I went with the second option, hoping to obtain a more authentic flavor in the final product.

All you need is bread flour (check!) and water (check!). That's it... Oh, and patience... And maybe a little bit of skill.... This will take quite a few days to get to a point where I can actually bake a test loaf. I have about 3 weeks before the in-laws descend, so I figure if the first batch doesn't go well, I still have time to make a new batch.

Take a clean bowl and add 1/2 c. bread flour and 1/4 c. "barely lukewarm water (80 degrees)" and mix thoroughly. I underestimated the process for getting cold, clean water to warm up to 80 degrees... I ended up microwaving some water (ended at 102 degrees) and waited for it to cool... This took about 1 and a half episodes of Bones on Netflix to do... Probably about an hour, but it felt longer than that...
Water too hot... Flour ready to go!

Not "quite" 80 degrees, but close enough... got a little impatient...

Then it said to "turn it out onto a clean surface (unfloured) work surface and knead the dough using the heel of one hand until it is smooth and elastic, 3 to 5 minutes"... Um... yeah... It's really sticky... and makes a whole lot of mess... and I'm not sure if I actually reached the "smooth and elastic" state described in the text... (and before you start ragging on me for the quantity of water in the measuring cup being WAY more than 1/4 c, I measured out a 1/4 cup from the measuring cup and added that to the flour...)
Sticky, sticky mess...


Messy, messy counter...

You then need to return the dough to the bowl, cover tightly with plastic wrap, and punch 4-5 holes in the plastic.
Evil, sticky mess, back in the bowl (where it belongs)

Try not to take out too much of your frustration on the plastic wrap...

Final product for day 1...

This is the final product (at least for now)... Before I go to work tomorrow, I'll "feed" it again with the same proportions of flour and water, but this time, the water just needs to be room temperature. According to the text, I don't have to knead it again until it is actually "bread"...