Showing posts with label Family Recipes. Show all posts

Thursday, August 27, 2015

Israeli Street Tacos

Fusion... usually code for "Nothing looks good so lets throw it all together and hope for the best"... Not this time folks! See I love Israeli food, and I love Mexican food. What's better than combining them?!

This may take some effort but I assure you it's well worth it....

Ingredients:

Olive Oil
a few springs of Thyme
1 Garlic Bulb
Green onions
1 lemon
salt/pepper
Parsley (flat leaf preferably but any will be fine)
Mint
Dill
Cilantro
ground Beef (try to go decent quality and around an 85/15 fat content)
1 cup chicken stock
1 sweet onion
a scant cup of bread crumbs (I just toasted some left over garlic bread and broke it down in a spice grinder)
cumin
capers
1 egg
Baharat (don't worry, recipe for that follows)
- 1 tsp black peppercorn
- 1 tsp coriander seed (I like a touch extra in mine)
- 1 small cinnamon stick, smashed into smaller pieces
- 4-5 whole cloves
- 1/2 tsp allspice
- 2 tsp cumin seeds (again, I like more cumin, it's my favorite spice)
- 4 cardamom pods
- 1/2 nutmeg, grated

Naan bread
Greek yogurt
fresh diced tomato
Extra cilantro and mint


Instructions:

In a dry pan on mid heat put in all the baharat spices. Heat until you start to smell the aromatics release. It'll smell heavenly. Like a savory Christmas smell.

Put them in a spice grinder and let her rip!

In a bowl put ground beef, egg, baharat mix, bread crumbs, shredded or finely diced sweet onion, capers (chop them up if any bigger than a small corn kernel), cumin, and garlic cloves (finely diced up).

I like to use an Ulu for herbs. It's a traditional Alaskan knife used with a bowl or alone. They're extremely sharp and quite lovely. If you don't have that, put your herbs in a small cup and use kitchen scissors to give it a good mix and chop.

Add about 3/4 of your herbs along with salt and pepper to taste to your meat mixture and mix up well. Ball it up yo! About quarter sized balls are good. I put mine in a hotter than hell cast iron pan with a touch of oil and brown the outside, then add 1/2 - 1 cup of chicken stock, and put in an oven at 300 for about 20 minutes or until they're cooked and most of the liquid cooks out.

Grab some naan and toast or bake it to warm. I like the small naan breads myself. I'd tell you I make it from scratch but I have yet to find a good recipe that doesn't turn out terrible for me.

Mix some of your Greek yogurt with your remaining herbs, a touch of salt, and lemon juice.

Spread the yogurt mixture on your naan, smash up some meatballs on there, add your tomatoes, and sprinkle on some cilantro, green onions, and mint.

We like to add a bit of edamame for some green in there. That one is up to you.

So good... really... sooooo good!


Thursday, March 21, 2013

Liquor is Quicker but Tandy is Dandy!

I had a craving. It was one of those childhood cravings you can't get away from til you have it. Peanut Butter Tandy Cake. Now all you folks not familiar with TastyKake may have never heard of this spongy cakey concoction. Well I'm here to tell you all about it and trust me when I say you will never forget it! I will say that my version is slightly different than the packaged one so if you were a fan of the Tandy Cake from day one you may be in for a bit of a change of pace. But trust me on this, it's damn good. 


Ingredients

4 eggs

2 cups sugar
1 tsp (I dump in more cause I like it) vanilla extract
2 cups AP flour
1 tsp baking powder
1 cup milk
2 tbsp butter
Peanut Butter (this is your judgement call, use as much or as little as you like)
1 German chocolate bar (substitution of a Hershey bar or similar item is acceptable)
about 1/4-1/2 cup Nutella
Chocolate Chips for decoration

Mix together everything except Peanut Butter, Chocolate, and Nutella

I bake it in two pans for the sake of having extra crusty parts. I use a 9x9 metal baking dish. Make sure your oven is preheated to 345F or so. My oven runs hot so I knock it down just a bit to prevent it from scorching. Lightly grease and dust the pans with flour, pour the batter in evenly. Bake for around 25-30 min or until the top turns kind of a light golden. 

As soon as it comes out, scoop your peanut butter on top about a tablespoon at a time evenly over the top. Spread it around a little at a time. It melts from the heat of the cake into a nice even layer. 

Now let it cool for about 15-20 min. 

In a double boiler or microwave safe bowl mix together the broken bar of German Chocolate and the Nutella. Melt until smooth and then spread evenly over the top of the peanut butter. 

Add a grid of chocolate chips over the whole cake about an inch apart so you have cutting guides later. It makes them super cute to serve. 

Let everything cool for at least an hour. (You can totally speed it up in the fridge or freezer though)

Spray a knife with cooking spray and cut into inch-ish squares. 

Enjoy with your favorite drink whether coffee, milk, or tea. :)


Sunday, January 6, 2013

Beans! Cuban Beans!

I felt the need to stock up on some extra iron this week so I went to an old standby my Mom used to make for me. Comfort food, ahh! 

It's simple and delicious and you'll love it! 

Ingredients: 

1 bag or 2 cans of black beans (if using dry, prepare as you normally would) 
3 potatoes, peeled and cubed
1/4 cup diced onion
1 clove garlic, diced
2 packets Goya Sazon seasoning
1 bunch of cilantro, loose chopped
1 whole fresh tomato, diced
salsa verde
sour creme
sliced green olives
finely diced onion

1 cup rice per person (if using regular rice ratio is 2 parts water to 1 part rice, if making quick rice, follow the box) 

Placed the peeled and cubed potatoes in a decent sized pot and cover with water. Add in 2 packets of Sazon, 1/4 cup diced onion, and clove of garlic. Place on high and let boil for 5-10 minutes until the potatoes are about 3/4 cooked. You will see them change colors a bit. 

Add in the beans and cook until they're soft, anywhere from 5 - 15 minutes depending on the bean. You should have a nice dark broth with your beans and potatoes now. 

Remove from the heat and add in some cilantro. Taste and add salt if needed, but not too much if you like the olives (like I do). They add a good saltiness to it at the end. 

Place rice in the bottom of a nice deep bowl and ladle over the beans and potato. Add a nice dollop of sour creme in the middle, sprinkle on some tomato, salsa verde, onion, and olives. Sprinkle generously with cilantro! You can add some nice Jalapenos too if you like. Although I will say they tend to overpower the whole thing. I haven't figured out how to add enough to get the heat but not too much to kill the subtle flavor of the beans and potato. 

Here's what mine looked like. I forgot cilantro at the store (will be rectifying that tomorrow!) so imagine it on there for me. 


It was really delicious. The best part is for you preggers or anemic folks, the potato and tomato contains lots of nice vitamin C which is necessary to digest the iron in the beans! Tada! Healthy blood! It's a nice rounded meal with lots of good stuff for you and easy to make. You could even do it in the crock pot (or mini crock pot) if the mood struck. 

Thursday, November 22, 2012

Thanksgiving Traditions...

Family lore states that this recipe was concocted by my grandmother (Charlotte, of peanut butter fudge fame) and her mother... in a time when people didn't waste a thing...

While making pies for a holiday feast, they ended up with extra pumpkin pie filling and extra apple pie filling... Not enough to make individual pies themselves, but too much to waste... So, in a moment of GENIUS they layered the apples and pumpkin and created the "PUMPLE PIE"... It just isn't the holiday's in our house without one...

Last year, I made a really AWESOME version and posted it on my "original" blog... I could not find any sugar pumpkins in the store this year, so I wasn't able to make it "from scratch" but I still wanted one... So I made an acceptable version...

Ingredients....
The players: Libby's Pumpkin Pie Filling (which I don't usually like to use, but I was in a hurry at the store and couldn't find the "real" pumpkin stuff so I made do with this), Pre-made Pie Crust (I usually like Marie Callender's but, again, I was in a hurry and it looked like they were out), Egg-Beaters (I've noticed that when I use pasteurized eggs in the carton, I don't get the allergic reaction that I get when I use whole eggs), Evaporated Milk, Butter, Pumpkin Pie Spice (I prefer this to cinnamon, ginger, cloves, and nutmeg, but you can use whatever spices in whatever quantities you want), Brown Sugar, 4 Apples (Braeburn and/or Fuji - I like mixing my apples for the best combo of flavor). I got the big can of pumpkin that makes one 9" Deep Dish pie... when making Pumple Pies, this particular recipe makes two pies.
First, peel, core, and shop the apples into bite-size pieces.

Next, melt some butter in a pot...

... and add the apples. Saute for about four minutes.

Then, add about 1/4 to 1/3 cup of brown sugar and about 1/4 to 1/3 tsp of Pumpkin Pie Spice and a dash of salt.

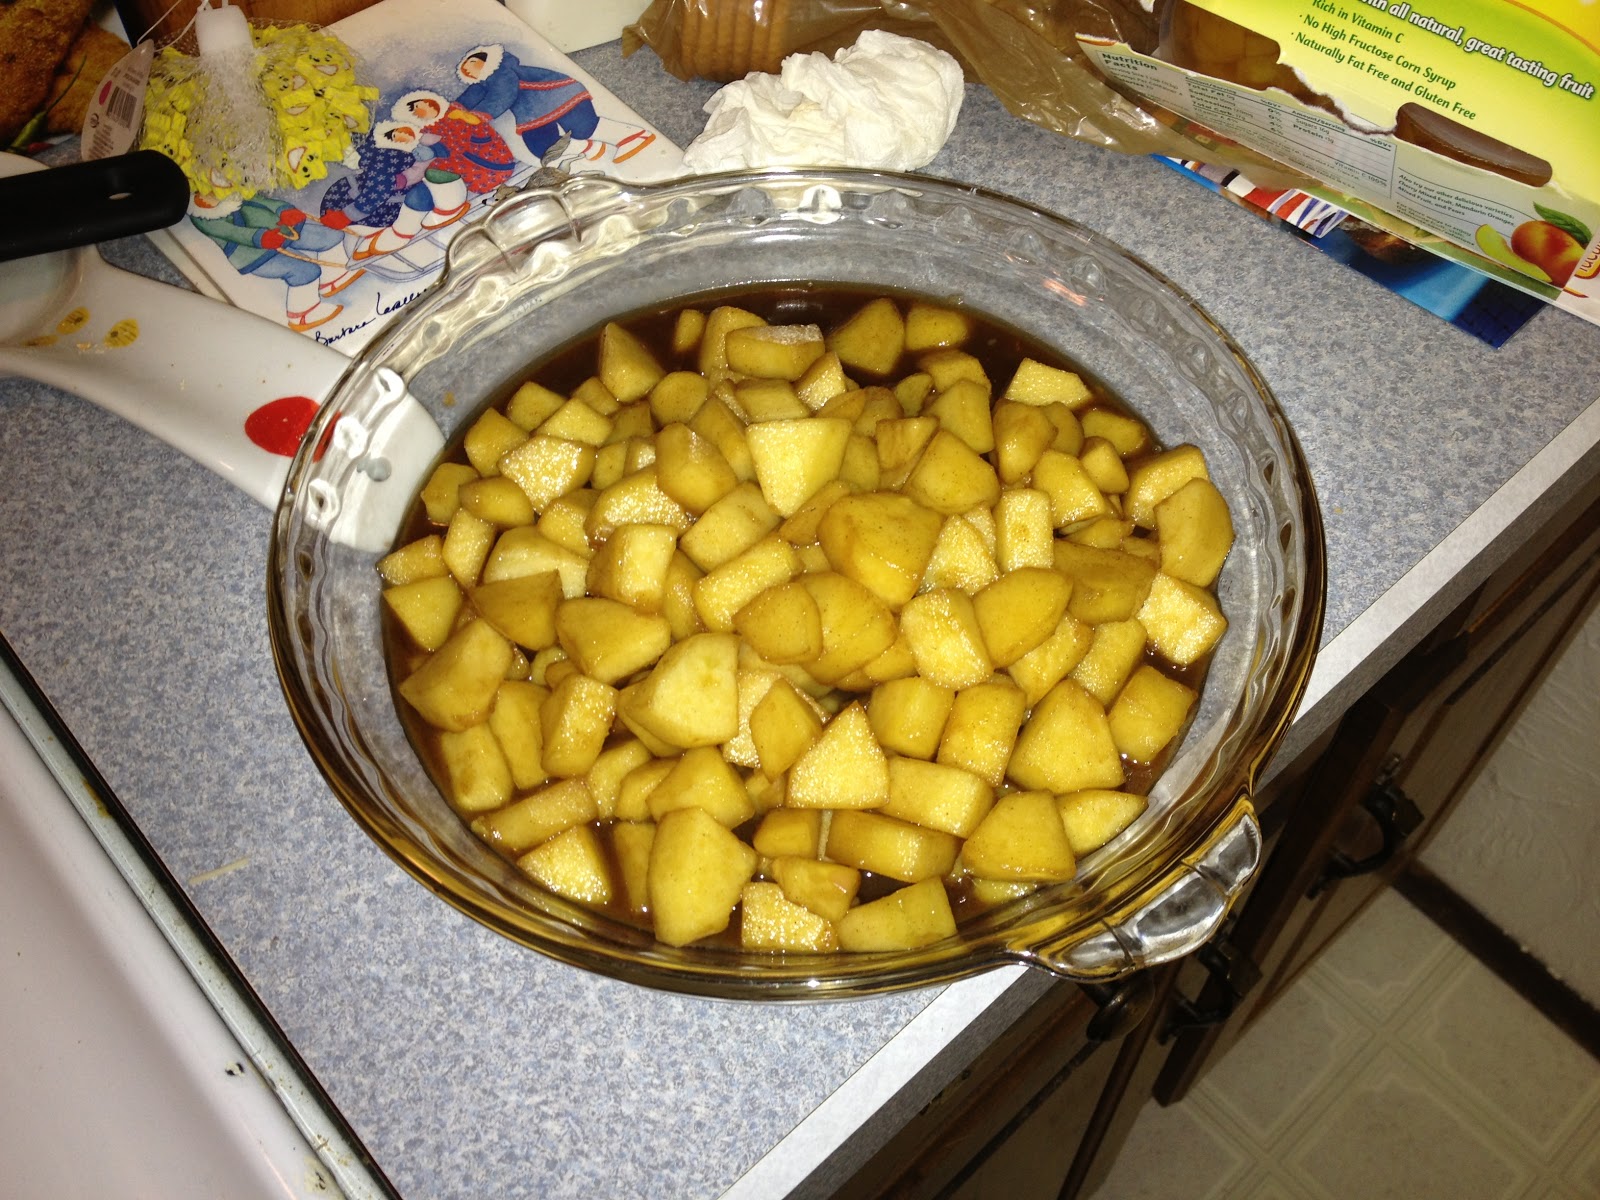
Mix well and continue to cook until the apples are tender and the sauce starts to thicken.

Remove from the heat and let cool (I find this works best in a 9x13 glass cake pan, but use whatever you have)

While the apples are cooling, thaw the pie crust and place on a foil-lined cookie sheet (you'll be very sorry if you skip this step). Use a fork to dock the bottom of the pie crust (ie: poke a bunch of holes in it)

Next, add the pumpkin, eggs, and milk to a bowl (using the recipe on the can of pumpkin)

Mix thoroughly to combine.

When ready to assemble the pies, get all of the ingredients together and preheat the oven according to the directions on the can of pumpkin.

Add a layer of apple to the pie crust. You can spoon in a bit of the cooking liquid from the apples.

Ladle the pumpkin on top of the apples... The dark ring you see around the top of the crust is because I added too much apple cooking liquid before adding the pumpkin...
 Put in the oven and bake according to the directions on the can of pumpkin...

Just out of the oven... Now you see why the foil-lined pan is necessary... no one wants to clean their oven ON the holidays...

Let cool ... as you can see, the pumpkin slumped a bit... I did not precook the apples long enough for them NOT to shrink in the pie... Additional apple liquid bubbled up through the pumpkin... But that's only because I added too much to the apples upon assembly...
The finished product! You can see how the layers form...
If you don't want to try to make one of these yourself, just come on over to my house on Thanksgiving or Christmas... I will always have one (or two) around...

Of course, as always, if you have a favorite pumpkin pie filling recipe, apple pie filling recipe, pie crust recipe, etc, please feel free to use your favorites... This tutorial is more a "concept" than a strict recipe.

Happy Thanksgiving Everyone!