Showing posts with label Under 15 minutes. Show all posts

Wednesday, December 26, 2012

Dinner for 1

Going through my current "lifestyle change" has left me with the quandary of what to nourish my system with... Typically, this time of year I make at least one pot of soup a week and eat off that for a while... My housing situation has changed and I am not as free to make those decisions as I once was (and hope to be again in the not-too-distant future). I have been left with making GF pasta (which gets old really fast) or purchasing frozen dinners. Now, don't get me wrong, frozen dinners have come a long way from the cardboard crap of the past... With steam bags and trays, frozen dinners seem a mighty good (and healthy) option... However, with my dietary restrictions, I can only eat about 1/5 of the offerings, and of those 1/5, I usually only buy 1/4 based on my own tastes... You can see where things get challenging and I end up just going to McD's and getting a plain bacon cheeseburger...

Case in point - I purchased a potsticker entree for my lunch one day... It had red peppers in the "veggie mix" but I was willing to overlook that addition and just pick them out... I also neglected to read the KIND of potsticker that was listed on the front... Getting a tofu one instead of chicken or pork is kind of a let down... Since I was the stupid one who didn't read the package all the way, I made myself eat it... or at least I tried to eat it... The potstickers tasted like sweet and sour feet and the "veggie mix" was entirely made up of red peppers... Yuck!

I had an epiphany! I can purchase potstickers that I like, add some frozen brown rice, and the veggie mix of my choice and make my OWN frozen entree! So I got a small bag of chicken potstickers (a little bit healthier than the pork variety, but still tasty) and some already-frozen brown rice. I added about 1/2 cup of the brown rice to the bottom of a plastic container and added 3 potstickers on top (the # 3 came from the amount in the original "tofu" packaging). Then I topped off the container with broccoli. **IT IS VERY IMPORTANT THAT ALL THE INGREDIENTS STAY FROZEN... MAKE THESE, THEN EITHER MICROWAVE IMMEDIATELY OR PUT THEM BACK IN THE FREEZER**
Still frozen, with a bit of sauce added....


Now, I know that this is NOT a GF dish - the potstickers are made with flour... But since I'm allowing myself to eat the potstickers, I prefer to keep it "gluten-lite" and use teriyaki sauce made with tamari rather than soy... It's a personal preference. If you have a better "sauce" then by all means use it... Pour some over the potstickers (to add a bit of moisture to the skins while they cook) and a bit over the broccoli... Then put the lid on and stick it in the freezer for future use... Don't go overboard or your rice will be overloaded with teriyaki sauce and it probably won't be as good. BTW - Yoshida's sauce would probably be awesome on these!

Cooked, and ready to eat!
When you are ready to eat it, just open up one of the corners of the container to allow it to vent and microwave for around 5-6 minutes... This is very easy to put together and keeps well in the freezer. Great for a night when you are by yourself and don't have the time or inclination to cook a meal... And this way, you know pretty much what went in to it (other than the potstickers, of course) because you picked all the ingredients yourself. Season however you want... I typically add just a bit of black pepper...

Sunday, December 2, 2012

Raid the Fridge Bruchetta

I can't remember if I've spilled the beans here yet or not but I'm about 18 weeks pregnant at this point. (Translation - a little over 4 months along) Although I'm not experiencing the "normal" pregnancy symptoms all the books seem to talk about (frankly I feel like I'm totally allergic to pregnancy), I am starting to get a bit more of an appetite. I was hungry this afternoon and my cravings seem to center around things with HUGE flavor and that stay rather healthy.  I think I got lucky on that one. Hopefully the little one feels the same way. Either way, I did some fridge diving and came up with an old favorite I haven't made in quite awhile. It's quick, easy, and requires very little cleanup. These are all big plus signs for me so I'm going to share in case you feel the same. :-) 

Easy Bruchetta

-  Nice thick Italian or French Bread, sliced on the diagonal - my slices ended up being    about 4 inches across - average 2 pieces per person
-  1 clove fresh garlic, smashed and diced
-  1/4 cup finely diced onion
-  8-10 fresh basil leaves (estimate, it's ok), julianned
-  2 nice tomatoes, diced small (this will make about 5-6 slices)
-  2 slices of Capicola ham per serving - you can probably substitute any cured meat here, we just like capicola
-  a good quality balsamic vinegar
-  a good quality extra virgin olive oil (I noticed the irony too)
-  a pinch or two of salt
-  fresh grated Parmesan (again, optional but fantastic!)


Mix together the tomato, basil, onion, garlic, and a pinch of salt in a small bowl. 

Lay the bread out on a cookie sheet or your toaster oven pan. I like the toaster oven because it's a little easier to control and way quicker. 

Spoon the tomato mixture onto the bread evenly across all slices. 

Chop up the Capicola and sprinkle on top of tomato mixture. 

Drizzle each slice with balsamic and olive oil in about equal amounts. 

Place under broiler (or on broil in toaster oven) for 5-6 minutes. Keep an eye on it and when the exposed bread turns a little golden it's ready. The Capicola will also start to bubble and get crisp. It's like bacon but better! 

Take out and using a spatula transfer to a plate. Grate some Parmesan on top and add just a pinch more salt to finish. Salt is optional but I think it's rather tasty with it combined with the tomato. 


My Description of one serving


How much I actually ate, and savored every bite!


You get your essential oils in the garlic and olive oil, some spice with the basil and balsamic,  vitamins in the tomato, and well other than that it's just good! It's a great lunch or dinner. It's also really good paired with some mixed greens with a little of the balsamic and oil drizzled on top. Add a dash of oregano and it become spectacular. 


Monday, November 5, 2012

Fabulous 15 Minute French Onion Soup

Pregnancy. It comes with lots of stuff but for me its filled with nausea, food aversion, and weird cravings. Oh yeah, and insomnia. That's where this recipe came in.

We cancelled cable awhile back. We weren't watching it and quite frankly most times I don't miss it. We Netflix now. :) That being said, when you're awake at 2 am there is VERY little on in rural Mississippi. We have religious programming, infomercials, bad newscasts, and PBS Create network. That last one is a savior for me. They are like HGTV without the vapid ugly decorating whores. Mostly though, at night, they rerun the fantastic episodes of French Cooking with Jaques and Julia. This is perhaps my favorite show of all time.

The episode on was for many things like delicious Choux pastry from which cream puffs and wonderful turnovers and danishes were made (that to come later). They also made a wonderfully simple onion soup. So I have had this craving for 2 days now. It's easy, takes like no time at all and tastes wonderfu1!

Fabulous 15 Minute French Onion Soup (for one)

1/2 large onion, large diced
1 can or 1/2 carton good beef stock, I go with Swanson or Kitchen Basics
3 healthy slices of a good french or Italian bread, we had some for making deli sandwiches in the house (note: don't use loaf bread here, go splurge the $1-$3 at your local bakery for good bread. It's totally worth it)
 1 1/2 cups Cheese, it calls for Gruyere but I didn't have that so I mixed a nice salty goat cheese and parmigiano
salt and pepper to taste (liberal)
1-2 tbsp butter

Depending on the size of your pot, put in enough butter to cover the bottom thinly when heated. Turn heat to high and add in the onion.  Sprinkle on a decent amount of salt. Crush some peppercorns and add. Saute until the onions are translucent.

Add in the beef stock and bring up to a nice rolling boil. Reduce to medium heat and add in half the cheese. Stir constantly until melted. it only takes a minute or two. Taste and adjust the salt and pepper as needed. Remove from heat.


I used my toaster oven to toast the slices of bread. Break them up and put them in the bottom of a nice bowl or crock. Add the onion soup over the bread. Sprinkle the remaining cheese on the top. Put the whole bowl in the toaster oven on broil until the cheese bubbles.

Wait a few minutes, hot cheese burns your mouth. It's quite delicious!

I never knew it was quite that easy but it makes a nice easy meal for one or two! (Jeff goes sin cebolla)


Wednesday, October 31, 2012

Pumpkin Pie? Why yes please!

My friend Kadee sent me this recipe. I, of course, tweeked it to make it super delicious. And come on, who doesn't want to drink pie! 

Makes a wonderful easy treat while watching for trick-or-treaters. 


Ingredients:
1 cup pumpkin puree (I used what we had left from last years Halloween pumpkins I had painted)
1 very ripe medium-sized banana, you can use the frozen ones you forgot about in the freezer

cup fat-free vanilla yogurt, my favorite is a greek style
2 tbsp honey (We were out of honey and the honey dude hasn't called me back so I used Karo Syrup)
1 cup milk or cream, you could use any sort of liquid that suits you, I just went off of the standard pie recipe

a splash of Mocha or Chocolate flavored coffee creamer, totally optional but why not?! 

3/4 tsp Penzey's Baking Spice
a splash of vanilla extract
a handful of crushed ice

Toppings:


Whipped Cream


Candy

Throw everything in a blender. Make sure you remember the lid. Throw that puppy on high speed and let her rip! 


Pour into a lovely glass, preferably with a straw. A scoop or squirt of whipped cream on top and your favorite tiny candy crumbles on top. Perfectly festive! 

Saturday, October 20, 2012

Redemption Spelt Berry Apple Pear Salad

This isn't an original but it's my tweeked version of a recipe found here: 

http://kitchenkathleen.blogspot.com/2008/03/apple-and-spelt-berry-salad.html#


It's so delicious and reminds me of good times in Florida. It was a regular purchase from Native Sun when I lived there and I missed it so bad I went searching for the recipe. 

Apple, Pear, Spelt Berry Salad

1 cup cooked spelt berries
1 pear, large diced (any variety, I liked the green ones)
1 apple, large diced (any variety, I LOVE granny smith but used Gala because it was handy)
about 1/4 cup celery, sliced thin
1/2 cup dried cranberries, soaked in about 1/8 cup water to reconstitute a little
1/3-1/2 cup greek yogurt, plain or vanilla work
2 tbsp cream cheese
1 tbsp lemon juice
2.5 tbsp honey, sugar, or karo syrup (I used karo because I didn't have any honey left, but honey tastes better)
1/2 tsp Penzey's Baking Spice (or something similar

Cook the spelt berries. Boil 1.5 cups water and add  in 1/2 cup dry spelt berries. Cover and let simmer for about 40 minutes. Turn off heat, leave covered, let cool. 

Mix the wet ingredients together until kind of soupy. 

Toss together dry ingredients until mixed well, including spelt berries. 

Combine everything into a nice serving dish or storage container. 

Keeps in the fridge for about 5 days pretty well. After that it gets a little soggy. 

You can substitute something like a kamut berry or even some almonds, cashews, or walnuts if you can't find spelt. I just ordered mine from Vitacost.com. It's a great site and clicking through here should get you a free $10 credit! 

It's a perfect breakfast, meal, or snack. 


Friday, August 10, 2012

Grandma Charlotte's Fudge

Chocolate. Is there any word in the English Language (apart from beer, which incidentally goes fantastic with Chocolate) that cultivates such heartfelt love? I'm happily married to a wonderful guy I love, but I gotta tell you chocolate stirs a passionate feeling so deep it might just trump my nuptials. 

That being said, yesterday I was craving chocolate and was sorely lacking in supply. Of course my first contact was to Jen to help me out. She pulled through. Sort of... See her solution was to whip up some Grandma Charlotte (her's, not mine) Fudge. Now I'm not exactly a fudge making pro. Just to make it a big more interesting, she sends me the directions via a series of Text Messages! 

Here's what I got: 


Helpful right? 

So here's the translated ingredient list: 

1 1/4 cup sugar
2 3/4 tbsp cocoa
1 tsp vanilla extract (this was my addition because I LOVE it)
1/4 plus 1 tbsp milk 
1 cup peanut butter

The Cast
These ingredients probably need tweeked a little. The taste is amazing but it's a little crumbly to work with and Jeff likes gooey fudge. 
Here goes nothin'!

My favorite cook wear is All Clad. I love it. Can't explain it, just do. 

Sift the sugar and cocoa together into about a 6 inch pot. You can use smaller if you like but the more room it has to spread out (without being too thin) the better it will kind of carmelize. Add milk and stir well.  


Cold, Wet, and Sweet - There's got to be a joke there.
Add vanilla. 
I call this "Honeymoon Vanilla".
We bought it at a market somewhere in Mexico.
 Turn the heat on to a medium low. Let the mixture kind of warm up and start to get glossy. Keep on stirring. Think Nemo... 


Concoction Starting to Glaze
At this point, risk of burning is pretty low. So while it heats I recommend finding a dish and lining it with plastic wrap. I know, I know. Deviation from Grandma. But I hate dishes.  Grandma would still be proud. 

Wrap it Up.... 
 Here is about half way done. You can see some of the grainy-ness of the sugar on the spatula. Keep on stirring... 


At about 3/4 of the way through you'll be able to swipe the pan and the mix will hold consistency for a few seconds. 


Swoosh!
 Tilt the pot. If it still looks grainy and lump, keep on stirring. I played with my heat a bit here. Up a little to get the sugar to melt more. Not too high though, it's easy to burn. Burning sugar tastes like dirt... Well, sort of. First it tastes like caramel, then like dirt really quickly. Someone should talk to sugar... 

Grainy like a 90's camera phone.  
When it really starts to come together (this is about 8 minutes in) you'll get a little separation of cocoa and milk fat from the carmely sugary sauce. Keep stirring. I stopped for a second to show this but ideally you keep it all combined. 


I see swirls. 
 You're shooting for around 200 - 225* F. Keeping it there on a medium heat melts the sugar crystals without burning anything. I found this awesome candy thermometer at an estate sale for $1. If you don't have one, no worries. 


Between 200 and 225 it gets this nice black glossy look. You can read your fortune, or maybe just keep stirring and make fudge. Your call. 

Shiny! Squirrel! 
I turned off the heat and removed the pot from the burner just to cool a touch. It was really just because I needed 2 hands to prep my KitchenAid Mixer and Mom didn't have quite enough radiation to produce that third arm. 

Glass bowl, whisk attachment. 
I would show here putting in the peanut butter but again, no third arm. So here are a series of shots of the mixer combining everything. Put in the peanut butter first, start the mixer, than pour in the sugar/cocoa mix. 

PB in the center, whipping out. 


Whip it, whip it good now. 

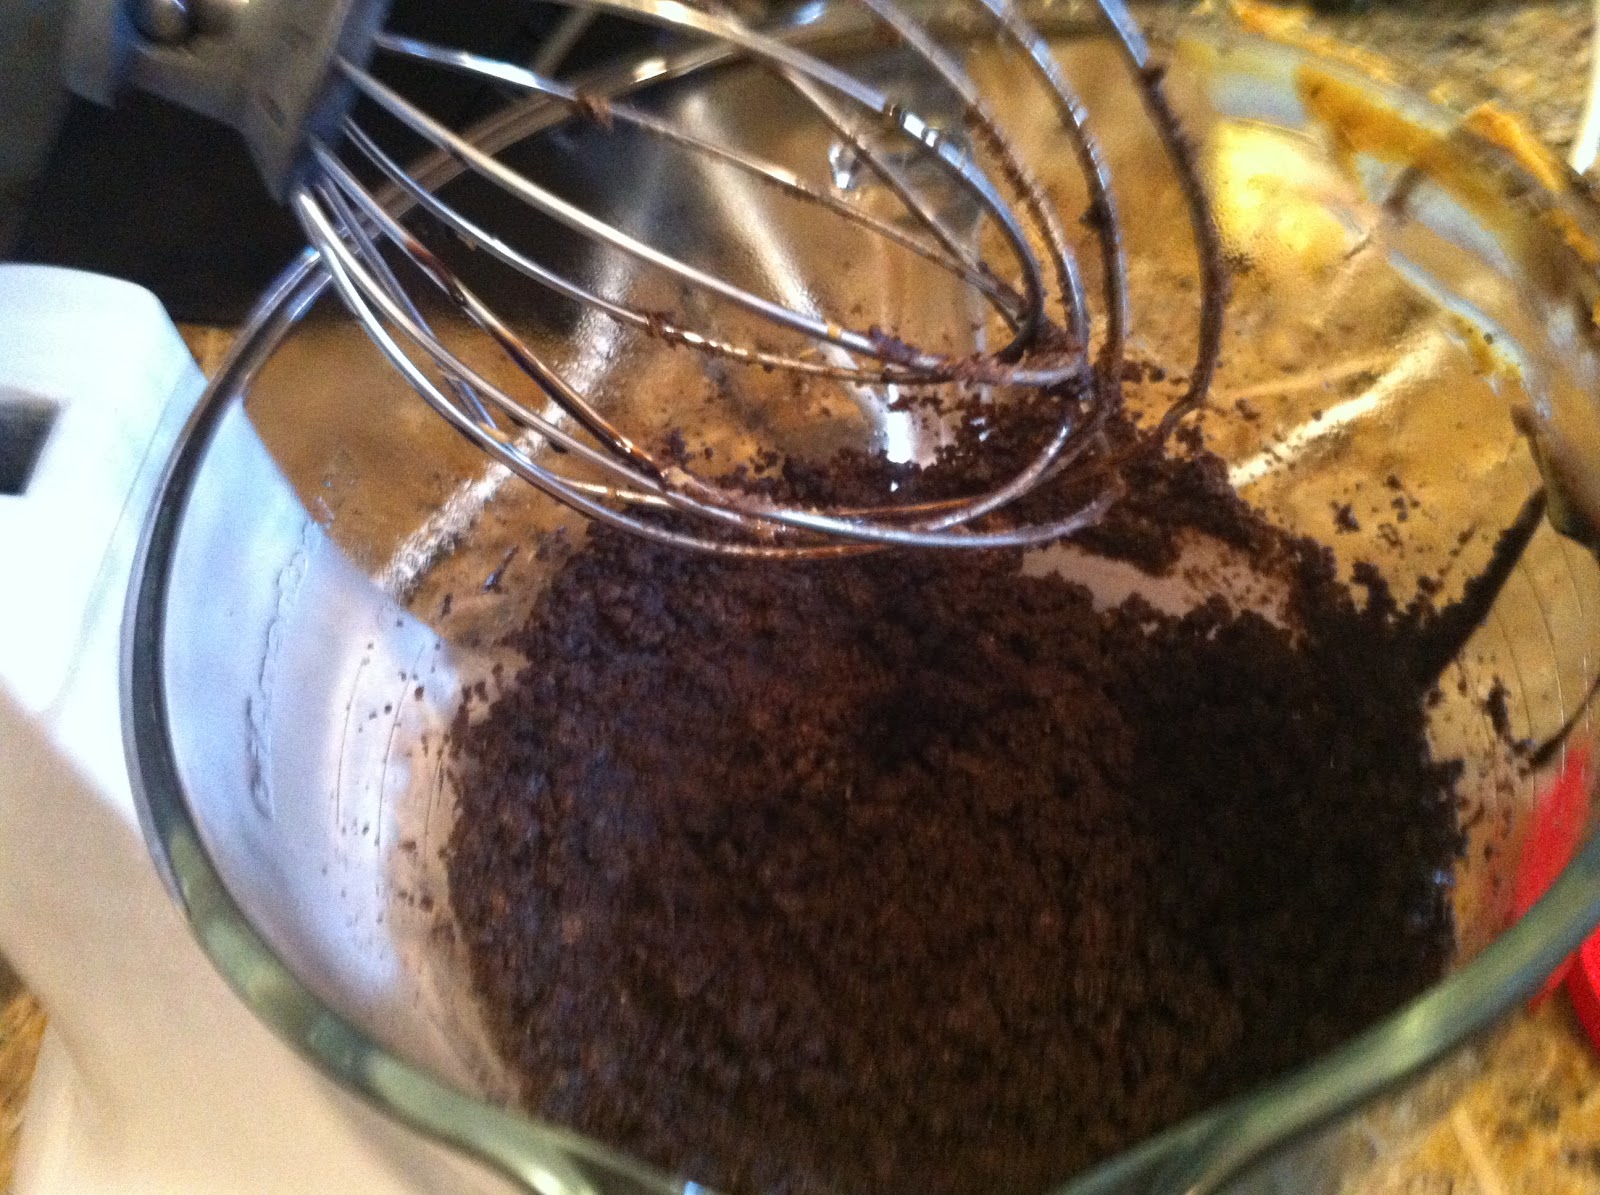
It fully incorporates and looks like Oreo Crumbs. At least mine did.

Me Want Cookie!

 Dump contents of mixer bowl into the lined dish. 


Fold over plastic wrap. 


I used a smaller bread pan to smash everything down tight and into the lined pan. You could use fingers if you want. This was quick and easy. 


Flipped the now-fudge out onto the marble counters, keep the plastic wrap on. 

Practice Safe Rolling. Prevent dirty counters. 
 Using a rolling pin, I smashed it out a little thinner. 


Purely Illustration. 


About as thick as a pen. 
 Get ready for my favorite part! I brewed up a cup of Brooklyn coffee and enjoy! 


Three of my favorite things! 

So here's to you Grandma Charlotte. And a big thank you to Jen for making my morning a little better! 


Thursday, June 28, 2012

Holy Balls It's Hot!

Mississippi. Summer. Instant Sweat. Our forecast here for the past few days has been 100+ degrees every day! Needless to say, like the last thing you want to do is turn the oven on. I mean, the electric bills are bad enough. So I decided to make a quick healthy dinner from local and home grown ingredients. My garden this year is looking spectacular. Three types of tomatoes (including some amazing san marzanos!), squash, zucchini, jalapeno, onion, raddish, fresh basil, oregano, and a whole bunch more. I love the garden. So here we go.

Caprese Salad
  This is the best salad for summer. At least in my opinion. It's savory, sweet, and includes all the junk your parents tried to make you eat as a kid but never made taste right. It's super simple.

   one tomato per person, sliced thick
   one half a fresh motzarella ball, sliced thick
   a handfull of basil leaves
   1/4 c a good fresh olive oil (don't buy junk!)
   cracked pepper
   a good quality salt
   zaatar spice (so optional but after visiting Israel, a necessity on most things for me)
   red chili flakes (optional too but good for your mental health)

Alternate a good pattern of cheese, tomato, and basil on the plate. (see picture below)
Drizzle olive oil on.  You don't have to use the whole 1/4c. Jeff likes less, I like more. Depends on who you are I guess. As my Dad would say, if you're asking with or without... it's always WITH! More sauce!
Sprinkle with pepper, salt, chili, and zaatar.

You're so done! How cool is that? Looks beautiful and takes like 3 minutes to make. It's insane. Try with fresh garden tomato and basil too. Makes such a difference.


Summer Sandwhiches
Use whatever you like here. I made two variations because I like a different sandwhich than Jeff. This seems like a pattern! Hahaha.

A good, fresh, artisan bread
lunchmeat, chipped (I love smoked turkey fresh from the deli. And I use Boars Head when I can. Love that)
provalone cheese
avacado for me
pepparoni slices
lettuce - generally the baby greens are my favorite
olive oil mayo

If I have to explain how to make a sandwhich, my guess is you haven't been reading our blog long.

What I put on mine - bread, sliced avacado, provalone, smoked turkey, lettuce
What I put on his - bread, mayo, pepparoni, provalone, smoked turkey, lettuce

I hate mayo, although the Hellmans stuff isn't bad, not quite so... snotty. Couldn't really think of a better word. Sorry to be gross. At least it has some flavor.

Guacamole
I make guac 3-4 times a week. It's a favorite amongst family and friends and never gets old. Delicious and healthy, just keep some avacados in the house.

1 whole avacado, pitted, removed from shell (do this with a spoon, it's awesomeness), and mushed with a fork
1 whole jalapeno, diced fine, seeds about half removed depending on how much heat you like
like a pinky sized piece of a sweet onion, diced
Adobo, go for the red topped one. It's the best
a heaping tablespoon of Sour Cream, I'm a total Daisy snob. It tastes better, I swear.
a few dices of the tomato you were using earlier. Or you can add a whole one if you want. This is your par-tay...

Mash it all together into a loose paste. Tada! You made guac. That wasn't so hard huh?

I put it all on a plate all pretty like. To mine I was craving some marinated artichokes so I threw a few of those on and some beets for good measure. Can't go wrong with beets.


All in all it took less than 15 minutes. You have amino acids, healthy fats, dairy, 3 servings of fruit/veggies, antioxidants, peppers with capsaisin that not only raises your basal temp buring more calories but also releases endorphins to make you happy. So hell, if you don't like the dinner, your brain will at least tell you you're happy anyway! Top off with a glass of good merlot and some dark chocolate for the ultimate meal.

It's just damn satisfying on a hot as balls day.