Sunday, August 12, 2012

Grandma's Peanut Butter Fudge (Fo' Real, yo!)

So, today I had a major craving for peanut butter fudge... It could be because I'm homesick, or overworked, or missing my grandma... Or it could just be that I've had a craving for it ever since I sent Jessie the text with the "directions" in it... Either way, I needed a break from my school work today and decided to whip some up...

BTW, Jessie, for someone who doesn't like to do excess dishes, you sure made it complicated! Made properly, it is a one pot-one plate experience, with a few additional tools necessary for making the candy.

Directions will be given by picture, so pay attention :) No measurements were taken. This very much depends on proportions and current weather (humidity), etc...

Add sugar and cocoa powder to the pot and whisk to combine.

The sugar-cocoa mixture should look like this (I had to add more sugar to get to this stage)

Add just enough milk to moisten the sugar. I started with about a 1/4 c. and ended up using about a 1/3 c. (just eye-balling it)

Turn the heat to med-low and switch to a wooden spoon... As Jessie said - "Just keep stirring..."

Just starting to bubble a bit...

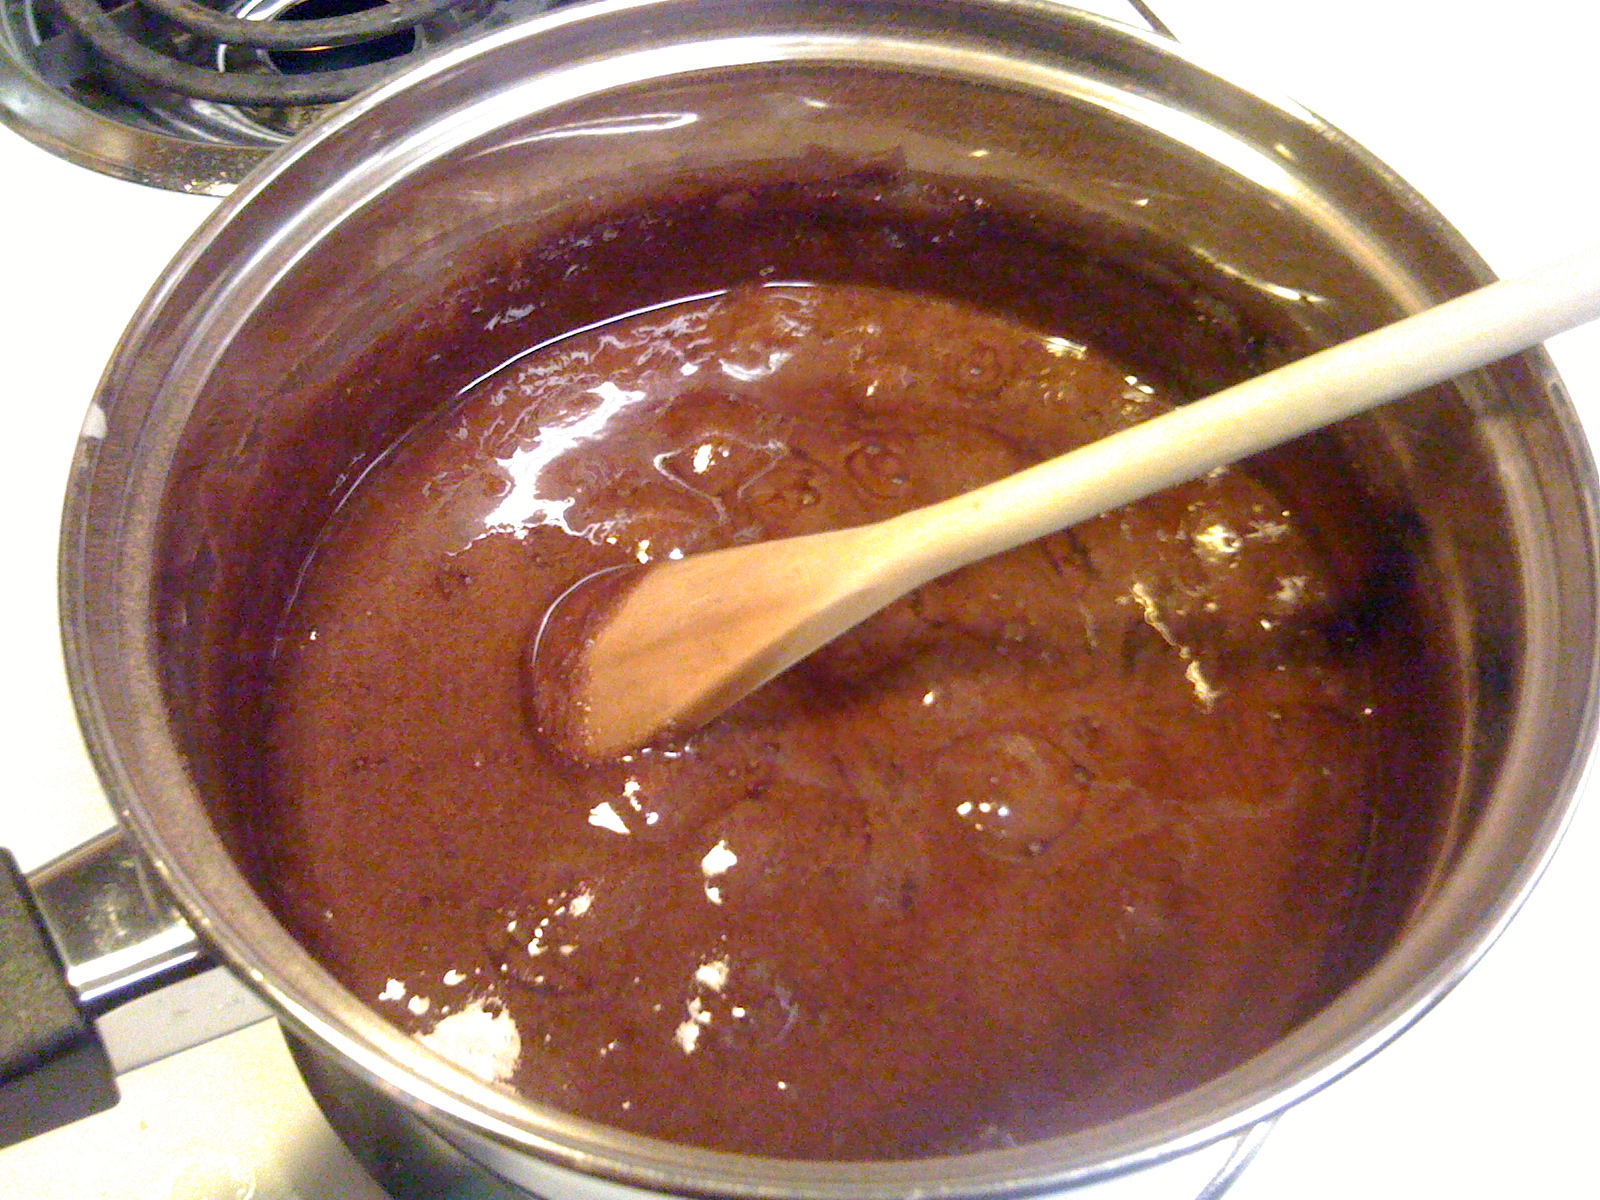
Getting nice and bubbly...

Really cooking now!
 It was at this stage that I tested the "done-ness" of the candy. I don't have a candy thermometer, so I tested it with cold water. (I didn't get a picture of this because it moves pretty fast). Pour some really cold water in a glass dish (mom used a small drinking glass, I use glass prep bowls). Drizzle some of the candy into the cold water. Stick your fingers in and manipulate the candy ball. It should form a nice ball, but still be pliable (soft-ball stage). If you cook it past this point, the fudge will be too tough to eat... Mine was in the perfect soft-ball stage, so I removed the pot from the heat. This is when you add the vanilla (it maximizes the vanilla flavor).

I also added a couple of heaping tablespoons of peanut butter to the pot and beat it with the wooden spoon to thoroughly incorporate the peanut butter (you can use smooth or chunky, your choice)... WARNING: It sets up REALLY fast so you better be prepared to dump it onto the greased plate as soon as it comes together... otherwise it will start cooling in the pot and it will take forever to get it out again...

Aaron took a picture while I was stirring... I know, not a very good one...

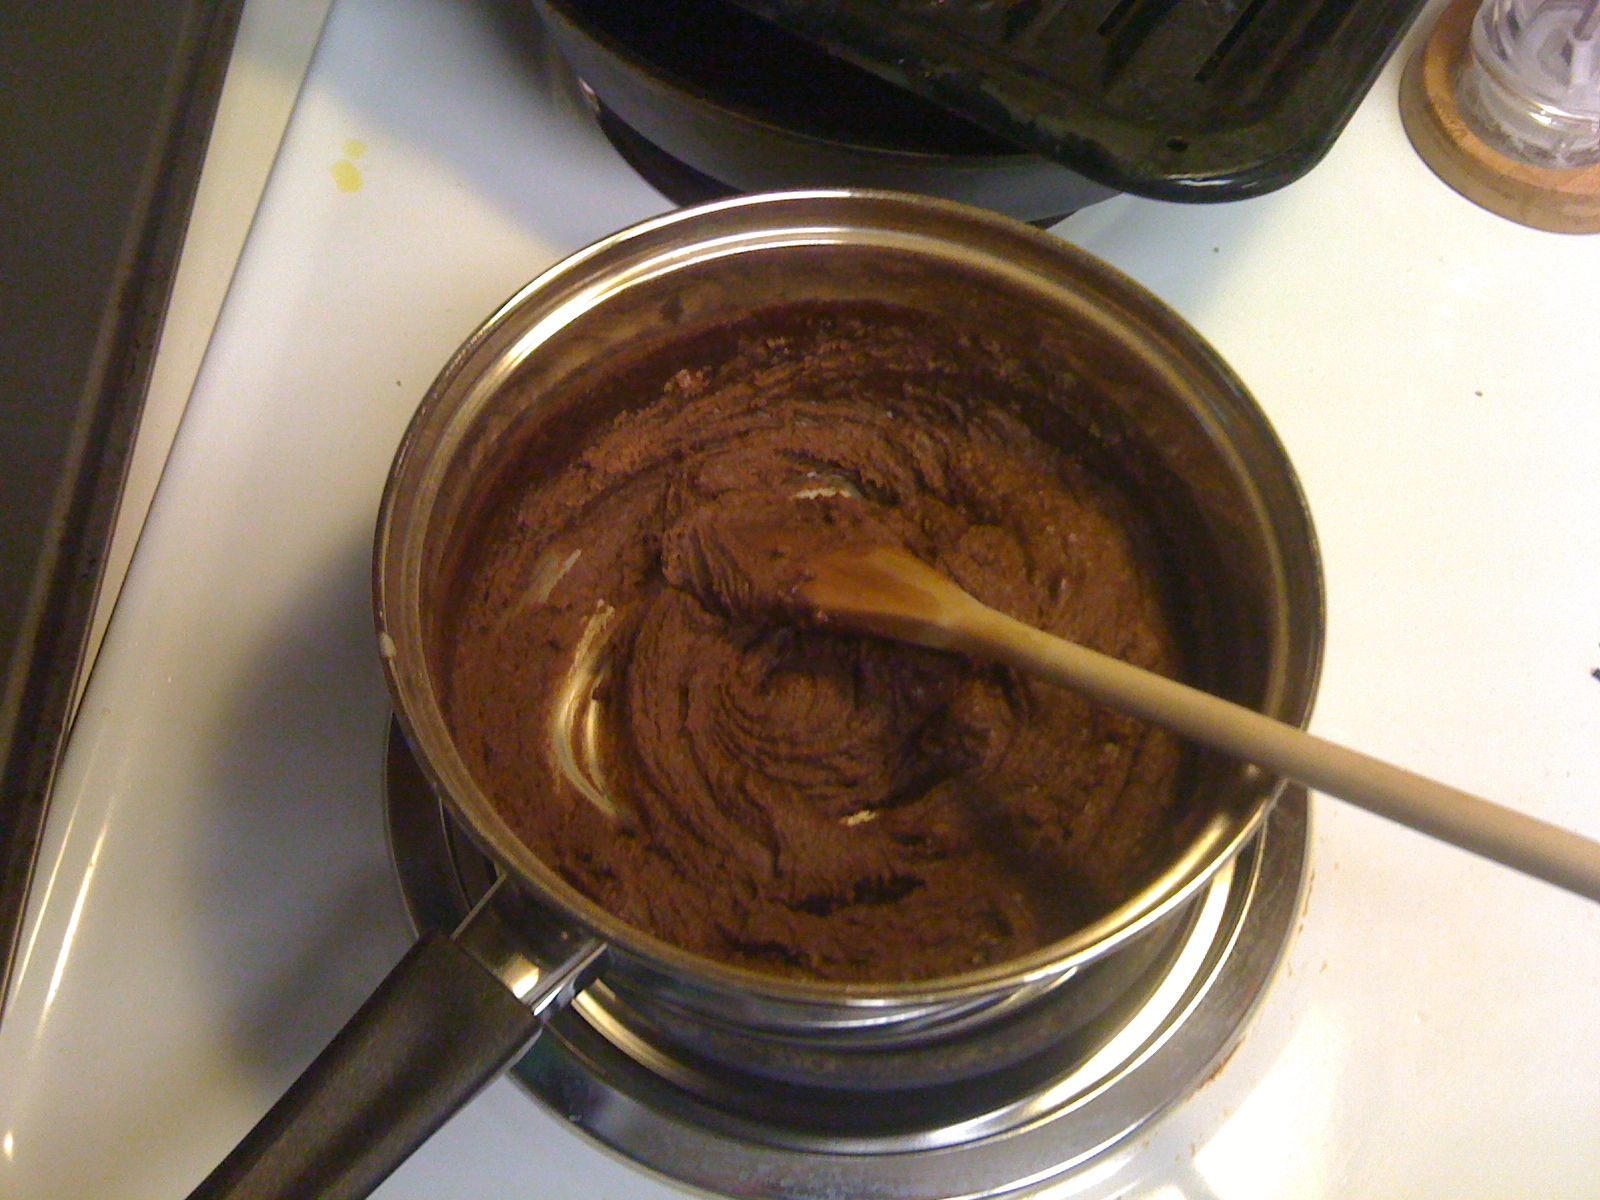
After it's been mixed... It should be the consistency of thick frosting...

Glob it onto a (greased) plate and press flat... Cut into squares while still warm to prevent breaking...
Let it cool and eat your fill!

My mom used to make this anytime one of us kids got sick. We'd take the (nasty) medicine she'd give us and then follow it up with a piece of peanut butter fudge... It made getting sick not so bad!

My grandmother is no longer alive, but anytime I visit my Auntie, she makes me peanut butter fudge. I'm usually not a great candy maker and the last few efforts of making peanut butter fudge were disastrous! My sugar constantly crystallized... it made for very gritty peanut butter fudge. But, it must be sufficiently humid out today because I had no problems with this batch... Yummy!

Friday, August 10, 2012

Grandma Charlotte's Fudge

Chocolate. Is there any word in the English Language (apart from beer, which incidentally goes fantastic with Chocolate) that cultivates such heartfelt love? I'm happily married to a wonderful guy I love, but I gotta tell you chocolate stirs a passionate feeling so deep it might just trump my nuptials. 

That being said, yesterday I was craving chocolate and was sorely lacking in supply. Of course my first contact was to Jen to help me out. She pulled through. Sort of... See her solution was to whip up some Grandma Charlotte (her's, not mine) Fudge. Now I'm not exactly a fudge making pro. Just to make it a big more interesting, she sends me the directions via a series of Text Messages! 

Here's what I got: 


Helpful right? 

So here's the translated ingredient list: 

1 1/4 cup sugar
2 3/4 tbsp cocoa
1 tsp vanilla extract (this was my addition because I LOVE it)
1/4 plus 1 tbsp milk 
1 cup peanut butter

The Cast
These ingredients probably need tweeked a little. The taste is amazing but it's a little crumbly to work with and Jeff likes gooey fudge. 
Here goes nothin'!

My favorite cook wear is All Clad. I love it. Can't explain it, just do. 

Sift the sugar and cocoa together into about a 6 inch pot. You can use smaller if you like but the more room it has to spread out (without being too thin) the better it will kind of carmelize. Add milk and stir well.  


Cold, Wet, and Sweet - There's got to be a joke there.
Add vanilla. 
I call this "Honeymoon Vanilla".
We bought it at a market somewhere in Mexico.
 Turn the heat on to a medium low. Let the mixture kind of warm up and start to get glossy. Keep on stirring. Think Nemo... 


Concoction Starting to Glaze
At this point, risk of burning is pretty low. So while it heats I recommend finding a dish and lining it with plastic wrap. I know, I know. Deviation from Grandma. But I hate dishes.  Grandma would still be proud. 

Wrap it Up.... 
 Here is about half way done. You can see some of the grainy-ness of the sugar on the spatula. Keep on stirring... 


At about 3/4 of the way through you'll be able to swipe the pan and the mix will hold consistency for a few seconds. 


Swoosh!
 Tilt the pot. If it still looks grainy and lump, keep on stirring. I played with my heat a bit here. Up a little to get the sugar to melt more. Not too high though, it's easy to burn. Burning sugar tastes like dirt... Well, sort of. First it tastes like caramel, then like dirt really quickly. Someone should talk to sugar... 

Grainy like a 90's camera phone.  
When it really starts to come together (this is about 8 minutes in) you'll get a little separation of cocoa and milk fat from the carmely sugary sauce. Keep stirring. I stopped for a second to show this but ideally you keep it all combined. 


I see swirls. 
 You're shooting for around 200 - 225* F. Keeping it there on a medium heat melts the sugar crystals without burning anything. I found this awesome candy thermometer at an estate sale for $1. If you don't have one, no worries. 


Between 200 and 225 it gets this nice black glossy look. You can read your fortune, or maybe just keep stirring and make fudge. Your call. 

Shiny! Squirrel! 
I turned off the heat and removed the pot from the burner just to cool a touch. It was really just because I needed 2 hands to prep my KitchenAid Mixer and Mom didn't have quite enough radiation to produce that third arm. 

Glass bowl, whisk attachment. 
I would show here putting in the peanut butter but again, no third arm. So here are a series of shots of the mixer combining everything. Put in the peanut butter first, start the mixer, than pour in the sugar/cocoa mix. 

PB in the center, whipping out. 


Whip it, whip it good now. 

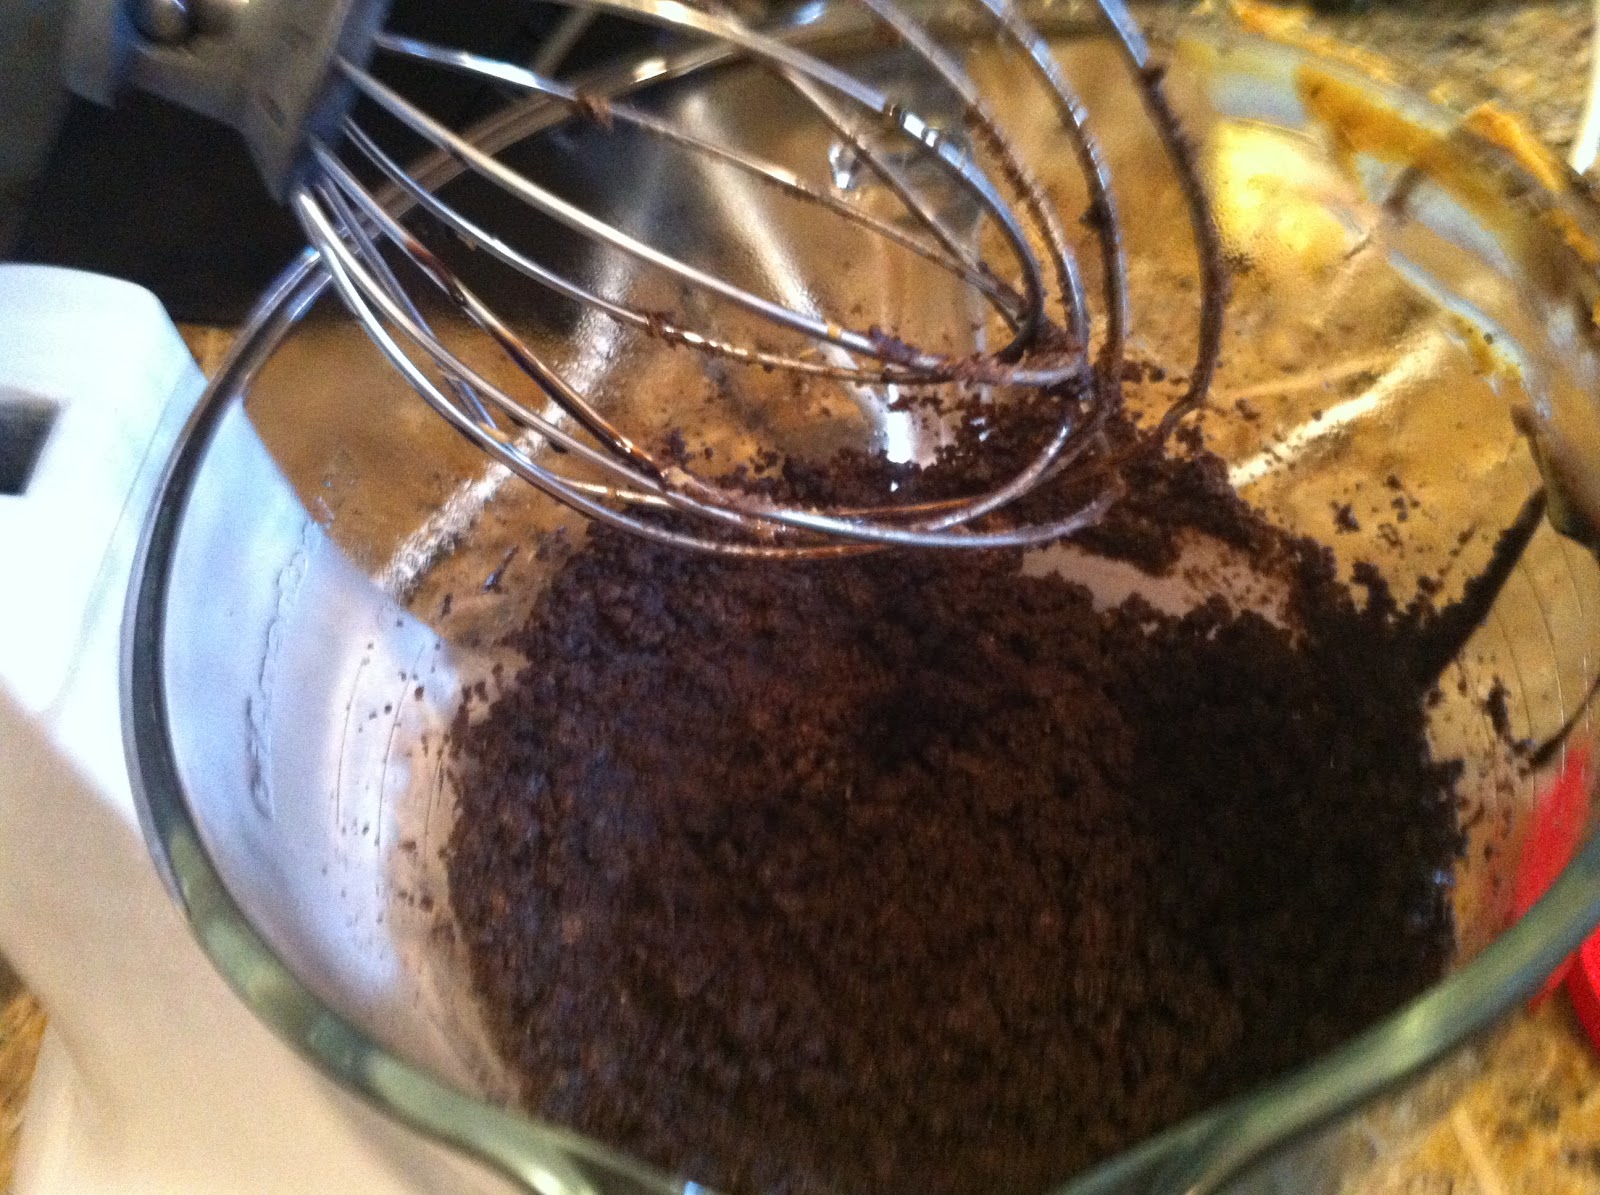
It fully incorporates and looks like Oreo Crumbs. At least mine did.

Me Want Cookie!

 Dump contents of mixer bowl into the lined dish. 


Fold over plastic wrap. 


I used a smaller bread pan to smash everything down tight and into the lined pan. You could use fingers if you want. This was quick and easy. 


Flipped the now-fudge out onto the marble counters, keep the plastic wrap on. 

Practice Safe Rolling. Prevent dirty counters. 
 Using a rolling pin, I smashed it out a little thinner. 


Purely Illustration. 


About as thick as a pen. 
 Get ready for my favorite part! I brewed up a cup of Brooklyn coffee and enjoy! 


Three of my favorite things! 

So here's to you Grandma Charlotte. And a big thank you to Jen for making my morning a little better! 


Tuesday, August 7, 2012

Indian Food: Good or Bad?

I've been feeling a little adventurous lately regarding cuisine... mostly because I'm getting burned out on rice and chicken as my fall back meal. One cuisine that I have never tried is Indian food (blame it on isolated living and being raised on a meat-and-potatoes menu plan). I've read ingredients of the dishes and it seems like it should be tasty. However, pictures of said dishes usually look like it has passed through the digestive tract already... SO NOT appetizing... So much so that I have no desire to try it. I don't like relegating one type of cuisine to the "no" list without even trying it first, so here is my challenge: Convince me that Indian food CAN look and taste good... then, maybe I'd try it... (maybe)

Monday, August 6, 2012

Cheapskate Chicken Dinner

Today in Mississippi it's been stormy. My joints are not a fan. I, however, am! The boy went to work today and I have been dragging myself around the house all day trying to accomplish things. That has not gone well. Dishes, yeah. Laundry, yup. Made the bed, cleaned the bathroom. Still, not one of my projects on the almighty white board has been crossed off. Why? I haven't a clue!

Now about noon every day he calls to check in. Today's Topic O' Discussion was dinner. A few weeks ago Kroger had some awesome free range chicken on sale. Folks around here seem to like the extra large family packs and didn't quite realize that the price per pound of the really good free range stuff was LESS than the over-processed over-packaged force fed birds. So for a pack of 6 chicken drumsticks I paid about $2. I took them out of the freezer yesterday night and wasn't quite sure what to do with them until about lunch. 

My brilliant idea was "shake n' bake". Of course by now you know I am not a fan of that prepackaged crap so I figured, Yeah, I can totally make my own. I started by rinsing the chicken and patting it dry with paper towels. Throw it in a bowl and add about a cup of milk and a good healthy amount of tabasco. I also added in a pinch of oregano from the garden and some Northwest Seasoning from Penzey's. Let it sit in the fridge for at least an hour but up to like 12 hours is fine. 

In the mean time... maybe have a beer and then prep this next step. 

Find a quart or gallon sized ziploc bag. Add in equal parts of flour (yes Jen, you can use GF easily for this!) and corn meal (not sure if that's GF, if not just double the flour), add in like a good tablespoon of Northwest Seasoning. If you don't have that, just kind of mix together some pepper, paprika, salt, black pepper, and cumin. You could also do a season salt of some kind. Basically whatever you wanna eat, ok?! Geez, you guys are picky! 

Shake that mixture up pretty well. Pick the chicken up from the milk and shake it a little over the bowl to get the heavy liquid off. Then put the piece in the bag and shake until it's covered. I like to do them individual for a nice even coating and no lumpy bits. 

Place the chicken in a glass baking dish, make sure the pieces aren't touching. Now add in about 2 tbsp of butter and 2 tbsp of lard. Yeah, I get that most folks these days aren't into "fat" but if you're gonna make this right, kick your conscious in the ass and go get some lard. TRUST ME! 

Now bake for 30 min at 350. After 30 min, jack the heat to 450, flip the chicken over and bake another 15-20 min until golden. And for the love of all that is food like, please use SKIN ON BONE IN chicken. You can be prissy and peel skin off later but for now, leave it on. Skin and Bones are where the flavor comes from. 

It will come out all sorts of yummy and taste sort of friend but has like WAY less unhealthy junk. Plus c'mon. The total cost for the whole dish for me was like $2.50. 

I also made some mashed taters. This is my one exception to the boxed food rule other than cereal. I love Idahoan potatoes. The box lists the ingredients as potato. That's it, just dehydrated potato. Yum! Boil some water, add in a hunk of butter and some garlic salt. Mix in the potatoes. For like $0.45 and 5 minutes you can have delicious potatoes. I love to add milk and sour creme sometimes too. Depends on how far you want to take this one. 

Some steamed green beans done in the microwave and it was cheap, simple, and surprisingly healthy. Did I mention it was damn good? Yup! 

I'd have taken a picture but we ate it too quick. Sorry!!! 


Tuesday, July 24, 2012

A love affair with Risotto

One of my favorite things about risotto is that it is already Gluten Free... I, know, it's awesome, right? I remember trying risotto in a restaurant in my late teens/early twenties and I remember not liking it... I blame the fact that my taste buds were still not mature enough for the complexity of flavors within risotto... It was the period when I thought Boone's Farm was the greatest alcoholic beverage... Yeah, I know, it wasn't the best time in my life...

A couple of years ago, I decided to try and make a semi-fancy dish for dinner with Aaron. I had tried Chicken Marsala at restaurants and it was OK (I have historically not approved of mushrooms in my diet) and I decided to try to make it myself (found Tyler Florence's recipe online... google it, if you are interested)... After all, if I didn't like the mushrooms, Aaron could eat them like he does in the restaurants... I couldn't remember what they served the Chicken Marsala with and I had just watched the "Good Eats" episode where Alton made risotto (how wrong is it that "Good Eats" is off the air? I could so totally use his help in understanding the science when converting my favorite recipes to GF options). I decided to try it...

My favorite thing about risotto? You don't really need a recipe... Nope... You don't... Oh, sure, you can use one for ideas on what to do and strictly measure the ingredients and what not - but you don't NEED to... Seriously... All you need is (1) the RIGHT kind of rice - Arborio, (2) some aromatics (onions, garlic, etc), (3) some kind of wine/alcohol (whatever you have - white, red, marsala, etc), (4) another cooking liquid,and (5) your choice of flavor options. That's it... Really...It is the process that matters, not what you put in it.

I have a container of Arborio rice in my pantry JUST for making risotto - you can't exchange it for long grain or jasmine rice. The Arborio rice has more starch and, as it cooks, the extra starch will break down into a nice thick sauce that lovingly coats the rice grains. If you try to cook Arborio rice like you would regular white rice, you will end up with a sticky, gummy, lumpy, rice ball that is not at all appetizing... Save the Arborio for risotto.

The MOST IMPORTANT STEP is to preheat your liquid choice. You generally want to let a pot of it simmer on the stove somewhere near your risotto pot. You can use any kind of stock (chicken, beef, vegetable, mushroom, seafood stock etc). You DO NOT want to use water - it will not impart any flavor to the rice... and you don't want to end up with bland rice, do you? It helps to have a ladle in the pot of liquid to make it easier to add to the rice when you need it. I've also added dried herbs to the simmering liquid, to add more flavor to the rice... You don't have to, but you can.

Once you have your liquid simmering, the risotto starts out with the aromatics sauteing in some oil (I use olive). Depending on how big of a batch you want to make, adjust your aromatic/oil ratio... When I make a single serving of risotto, I use about 1/4 cup (or less) of finely chopped onion (and maybe a little garlic, if I'm feeling adventurous) and about a tablespoon or so of oil.Some recipes call for shallots... Use whatever you want. Once the aromatics cook down a little bit, then you add some rice (about 1/3 cup for a single serving - I just eyeball it) and let it get coated with the oil and aromatics (If you've ever made Rice-a-Roni, it's the same idea as the first step for it). Saute the rice for a minute or two and then add enough of the alcohol to cover the rice. Start stirring... You will stir this pot for the forseeable future... I hope you didn't have any plans...

When the liquid from the alcohol absorbs and you can start to see the dry bottom of the pot when you move your wooden spoon through it, you are ready to add your first ladle of the hot liquid... Keep stirring... Repeat these two steps until the rice is cooked through (some prefer al dente) and you have a nice "gravy" - If you stop stirring for anything longer than about 5-10 seconds, your rice will burn and you will need to start over (speaking from personal experience here)... The stirring process helps to develop the starch to make the sauce, so it is important...

You can now add whatever else you want to the rice... want some cheese and veggies in there? Parmesan and asparagus tips (already partially cooked) can be folded in. I've seen peas and sauteed mushrooms as another possibility... Really, the kind of risotto is only really limited by what YOU want to put in it. Using red wine and beef broth, you would have a great companion for a beef dish. Marsala wine, parmesan, and italian parsley make a good side dish to Chicken Marsala... If you are so inclined, I've heard shrimp is a good additive to the risotto, but you'll probably want to add it a bit earlier in the cooking process to make sure it cooks all the way. Hmmm... I wonder if you can make an asian version by using sake and a soy sauce seasoned chicken broth...

The only thing I don't like about making risotto is all the stirring... I get tied to my stove for at least 30 minutes while making the risotto just because it has to be stirred all. the. time.... I usually don't put much stock in those "as seen on TV" products (look! You can cut a tomato!) but I think one of those Stir Crazy Robotic Stirrer thingies might be on my Christmas list this year... I'll still be tied to my kitchen, but by not having to stir the risotto (only adding liquid when needed), it frees me up to make the main dish to go with it... Then, I can have risotto more often! As much as I love the stuff, the constant stirring usually prevents me from having the time to cook it - you can't exactly read textbooks while making it...

Monday, July 23, 2012

She's Crashing! I need a pan of Brownies! STAT!

After the day I had today, anyone would understand why I NEEDED chocolate... You know, that base NEED that if you don't get it in the forseeable future, you will drop down dead... OK, maybe I'm being a little over-dramatic, but I don't care... I had a REALLY CRAPPY Monday and I NEEDED chocolate... (not to be confused with the days where I NEED a margarita... those are reserved for a different kind of day and a different post altogether).

I love my Mother-In-Law... She has become my personal shopper when it comes to my challenge of going Gluten-Free. She constantly sends care packages, and each time, there is something new for me to try. Well, this particular item has been sitting on my shelf in my pantry, mostly because I haven't had time to bake for a while... Didn't really have time for it today, but, you know, I needed the chocolate...

Vegetable Oil, Egg Replacer, Brownie Mix, Vanilla, and Water!

I almost cried because I didn't have my usual egg replacement options for the brownie mix (the only applesauce in the house has cinnamon in it... I wasn't feeling adventurous)... and then I remembered that she sent me a box of egg replacer when she sent the brownie mix. Somehow, the jar (it HAD to be repackaged - long story) got shuffled to the back of my cabinet and I forgot all about it... But, I found it and I had no excuse NOT to make brownies now!

I pretty much followed the directions on the box - except for replacing the melted butter with some vegetable oil and replacing the egg with the egg replacer mix. Oh, and I omitted the nuts, primarily because I don't have any (I AM a girl, ya know!).

What the ...?
I learned very quickly that my usual method of mixing brownies would NOT work with this mix... To be fair, it did call for the use of a hand mixer, but I, in my hubris, deemed it unnecessary... They knew what they were talking about... I have a VERY sturdy whisk and this THICK batter almost bent the wires back (I stopped before it could and I brought out the more appropriate tool for the job).


Much better...
Also courtesy of my MIL is my awesome brownie pan (that I forgot to grease ahead of time - again, not completely following the directions on the box). I had to use a paring knife to unstick the sides a little bit before I could unpan the brownies (but not too bad - the oil in the mix helped)... I got impatient (apparently I undercooked the brownies, but I don't care - I love them extra-fudgy) and served me up three... YES, three brownies... After a day like I had today, that is the requisite starting number... What was that? Brownies for dinner? Yes please!


I'll probably be so sick tomorrow........


PS - after 3 more brownies, my guilt got the better of me and I had to have "actual" dinner - I can't in good faith allow myself brownies for dinner and still call myself an adult... but I did, at least, have dessert first!

Baby Spinach, Orange Bell Peppers, Cucumbers, Tomatoes, Green Onions, Parmesan, & a Balsamic Vinaigrette.
And if I haven't made myself clear by this point - the brownies DEFINITELY hit the spot!

Jen

Tuesday, July 17, 2012

More than just baby mush... NurturMe

Recently I ran across this company called NurturMe


You may be wondering why I was even interested in a baby food company as neither Jen or myself have any kids. Well, here's why. These things are good. So they sent out a little sample pack of the apple powder stuff. Nom Nom. 


Here's the awesome part. Those glass and plastic jar things that baby food comes in, they break. As in big giant mess. If you're me, about anything you carry around ends up in a mashed mess, likely in the deepest crevices of your purse. You never get it clean and never get the smell out. 


This company essentially makes dried fruit and veggie powder. It comes in these great little pouches that make the equivalent of one serving. Just add water and done. 


Now on to the really cool part and why a childless cook would love them, you can add these suckers to your recipes for USDA Certified Organic produce from smaller farms. Supporting the little guy, eating whole. And that's the point of this whole blog right? Good food with good friends. What better way to make friends than supporting them?! 


They even tout a good recipe page. Everything from pancakes to pasta. Remember when I squeezed in some squash to Jeff's venison gumbo? I can't remember if I told y'all that one. Well, now I can get the same effect, just without him noticing little chunks of yellow (note: remove the skin of squash when sneaking it in!). I just wrote a post today about some Banana Sugar Shortbread Cookies. Banana's out of season? Add in 2 pkgs of NurturMe and some extra water and done! 


We also bought a sampler pack to keep in our pantry. Here in MS we are rather known for bad storms. That one a few years ago, Katrina, yeah, that wasn't good. Having a few of these pouches around is a good idea for keeping up strength to fight zombies and all. 


More than anything, I just really like the company and product. No more worries about having food for your friends kids around. From the time they eat solid foods to age 4, this is like the one stop shop. My next thing to try is mixing it into a good 48 oz of water for some healthy nutrient packed flavored water. Those things you get to add into water are all gross and sugary. Lately I've been just boiling fruit with honey down to make syrup and mixing them together anyway. 


So do me a favor, just cruise around their website, check out their blog, and send me some ideas you have for using the packets in your every day food. Never know, I may even pick a post comment to reward handsomely. That's just the kind of giver I feel like today. 


Oh yeah, and Jen, they're all GF!